Colour palettes - colour grading

In black and white photography, tinting prints - tritone, duotone, quad tone, is a staple of the process. Black and white often uses hints of colour in the shadows and highlights to give the work a particular feel or look.

But in colour landscape most photographers don’t apply the same principles to their work. When it comes to editing, few consider using colour thematically. By that I mean, few consider using colour to give their work a particular kind of look or feel. Yes, they may saturate the colours or mute them, but that is often as far as it goes.

Adjusting the colour palette, or ‘look’ of a scene has been a staple of the motion picture industry for a very long time. Movies are there to tell stories and to take us into another world. One way that movie producers take us into another world is by the use of colour. They will often adjust the colour palette of a movie to give a certain feel to it. This is called ‘colour grading’.

In colour photography, many of us choose to adjust contrast and overall saturation of colours, but few of us use colour to convey a certain mood of feeling to the work.

Perhaps you feel that adjusting colour in this way is not what photography is about? Perhaps you feel that photography is about recording what was there?

I hope the opposite is true for you. That you like photographs to convey a mood or a feeling, and that you think of photography as a creative medium where you can cast a spell over the viewer. Photographs aren’t real. They never were. Everything about the process introduces a point of view: where you stood to make the shot, what lens you chose, what exposure you opted to give the shot. All these decisions mean that you are telling a particular story. A point of view. An illusion.

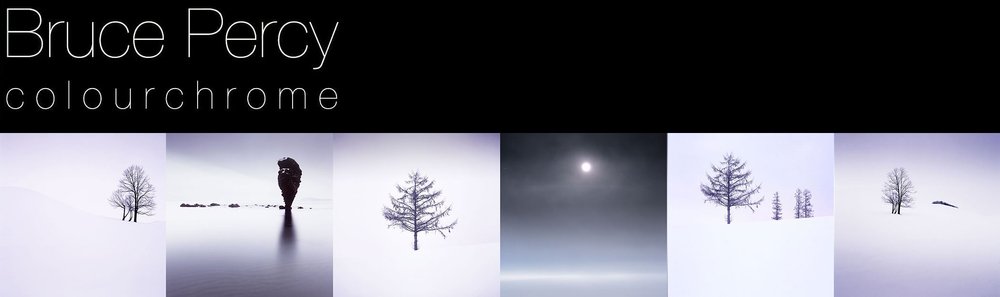
One of the most under-utilised tools in our editing process is the choice of colour palette. It’s something I’ve been working with now for about the past five years: I look for photographs that have similar colour palettes to work as a portfolio. Colour and how it is applied, is just as important as where to stand was, or what lens to use. Colour is part of how we tell our stories, and using it in a delicate, considered way to ‘colour grade’ our photographs is a skill that most never consider.

I colour grade my work all the time. I consider the use of colour just as important as all the other more mainstream actions we take. I’m not interested in whether the colour is accurate to what I saw, but more about whether the tonal and colour palettes give me the look and feel I want.

First draft of New e-Book is complete

Part 2 of my Tonal Adjustment Series

It's been slow progress, but I'm really delighted to discover to day that I've finished writing my new e-Book about Photoshop's curves adjustment tool. I've been trying to write this e-Book since last year - I remember doing some work on it in December, and then it got shelved while I was so busy running tours and workshops.

tr.jpg

It is my 'holiday' time at the moment. I'm at home for the next few months, and the only work I have to do is finish this e-Book and also one other special project. 

All I can say is that I had no idea I could write 50 pages about the curves adjustment tool. One of the best things about writing this e-book is that it's helped me clarify in my own mind just what is actually going on when I do any curve adjustments.

The new e-Book now needs to go into review mode, where I will check for errors and discrepancies. It comes with around eight Photoshop files to illustrate some of the more difficult to understand features of curve adjustments. And I'm hoping to put some QuickTime movies together to show you some screen sessions.

But it's all come together well so far. I'm very pleased with the results and I think it's going to be a very nice e-Book if you're interested in developing your knowledge of curves. The curves adjustment tool really is the most powerful way to modify and transpose tones.

Let the work dictate its tonal signature

There is a reason why the word 'tone' is used in the world of photography, as well as in the world of music. The photographic-tone has the same function as that of its musical counterpart. In both mediums of music and photography a tones operate the same way: it can exist in its own space, allowing us to perceive it as separate from other tones, or it can be deliberately clustered together with other tones, in the case of music, one sound, or in the case of photography one continuous area of varying tone.

The darkest tones in this image are mid-tones. I find it interesting that the darker tones - in this case - the mid-grey lines in the image appear much darker than they are because the adjacent tones are much brighter.I've become more considerate ab…

The darkest tones in this image are mid-tones. I find it interesting that the darker tones - in this case - the mid-grey lines in the image appear much darker than they are because the adjacent tones are much brighter.

I've become more considerate about the range of tones I wish to use on an image by image basis. Not every image requires the same tonal signature and it is a skill as a photographer to find out what signature each photograph needs.

In music, when we have tones that compliment each other, they sound pleasing or 'harmonious' and we tend to associate them with feelings of calm. Conversely, when we have several tones that seem to be at odds with each other they can be dis-pleasing or 'dis-harmonious' and this may create tension in the music. The same is true with photographs: tones that work well together are considered harmonious and tend to convey a sense of peace, while tones that don't work well together are dis-harmonious and tend to create tension in the picture.

This in no way to suggests that 'dis-harmonious' tones in a photograph are a bad thing: I often think that good photographs intentionally use degrees of both 'harmonious' and 'dis-harmonious' tones. But the use of them is done in such a way that it works and by doing so, we create contrasts not just in terms of differences between light and dark, but also in terms of areas of the image being at rest with other areas containing tension.

I think it may be easy to make a broad assumption that we should all be aiming to create images that contain harmonious tones only, but the use of tension in a photograph cannot be understated. It is just another way to create contrast when done well.

The problem in all of this, is being able to introduce tension when it's needed, and not as a result of a lack of expertise, or an untrained eye. Many beginners images will often contain areas where the tones do not work and may have unwanted or unintended tension. Applying careful amounts of tension in a photograph I believe, is a skill that only comes after some time. To impart disharmony into a photograph without it being judged as a poor edit or poor compositional choice is a hard one to pull off: there is a great difference between work that contains dis-harmony when it is unintentional, and work that contains dis-harmony as an intention.

I often see a correlation between the musical octaves of a keyboard and the tones of a photograph.

I often see a correlation between the musical octaves of a keyboard and the tones of a photograph.

Most beginners work suffers from a lack of application of tone. Tonal relationships are often not at the forefront of their compositions or edits. Tones tend to be muddled and confused or less thought out, because the photographer is still working on composition, and for most of us that means 'placement of objects within the frame'. Only composition is much more than that: it is not only the placement of objects within the frame, but also the application of tone and colour. In my own case, I think the use of tone and colour has been something that has become more apparent to me in the last few years of my photography. And that's after almost 20 years of editing and composition. For along while I only saw the objects within the frame and colour and tone were often a welcome but often unconsidered addition to my photographs.

And this is where today's post begins: I've come to realise that each photographer has a tonal-range signature. In other words, we have a tendency to live within a certain range of tones and most of our work is often edited or selected to work within that range.

You may find that one person's work is consistently dark, while another's work always uses the entire range from absolute black to absolute white. Another photographer may always create hi-key soft images: we all have our own pre-disposition towards a certain tonal response in our work. It's based on our own aesthetics: we gravitate to doing what we like, or what we feel most comfortable with.

But we often do it based on what we like, and seldom whether it's what the image is asking for. Applying the same range of tones to all of our images does not work. The same way that applying the same techniques to different subject matter will not always succeed: not every photograph requires the same treatment, and it is a skill for us to 'see' or recognise the tonal range that the body of work is asking to be worked within.

Lencois-Maranhenses-2018-(15).jpg

Each portfolio, or collection of work has its own tonal signature. That tonal signature should not be defined by the photographer, but instead the images should tell you what they need. Each landscape we visit often tells us what tones to use, and our edited work should reflect that, or at the very least be sensitive to it.

Much like certain songs live within certain octaves, so too do photographs tend to require to live within certain tonal ranges. Some may require a deft approach to high key tones, while others may require to use the full tonal range available. The key is in knowing what each image needs, rather than what we wish to force upon them.

We need to step away from our habits. If you are always creating dark images, then you are missing out on the upper tonal ranges that may offer some of your work a new avenue. If you are always creating bright work, then you are also missing out on the depth of what darker tones may do for some of your images. And if you are often creating work that use the full tonal range, as I think many of us do, then you should reconsider that sometimes using narrower tonal ranges can have great benefits and suit the work better.

As I said at the start of this article: we all tend to fall into using certain tonal registers or ranges in our work. We have our habits. Rather than forcing the same usual techniques and tonal habits on your new work, I would suggest you ask it what it needs. Let the work tell you. Often the work has a way of letting you know what it needs, and it's just up to you to develop the skills to listen.

Using tones outside of your comfort zone

When we edit our work, I think it's very easy to sit within a confined range of known and often used tones. We have what I would describe as a tone comfort-zone, one which we have settled into and tend to apply to most of our work.

Part of this is due to visual awareness issues, of not really thinking about luminance in the first place. We think of our images more in terms of scenery - mountains, rivers, grass, rocks, whatever. But we haven't passed this early stage and moved on to thinking about these subjects less as what they are, but what they provide in terms of luminance and other tonal qualities.

Indeed, our edits can be rather narrow in their tonal range, just like our vocabulary is narrow when we first learn to speak. We have to move outside of our comfort zone at some point, but this can be difficult if we're not really aware of what's out there and how luminance levels in the far brighter and darker regions of our images may serve us.

One technique I use is to push the luminance to extremes and then reign it back until I think it looks good. It's well known that if you move something to where you think it should be and compare that to where you would have ended up if you pushed it well beyond where you think it should be and move it back, your initial judgement will have been conservative. In other words, by really going over the score and then moving it back to where you think it should be, you'll find you've pushed the boundaries in your edits.

We all have our visual comfort zones and it's good to try to move beyond them. The only way to do that is to exercise your visual awareness by placing yourself at the extremes well outside the normal parameters that you reside, and see how the new terrain fits.

Our visual sense needs to be exercised for us to learn to truly see what is possible, and this is one such way to do it.

Transposing Tones

I've been working on a new e-Book for some time now - 'Tonal Relationships'. 

Each time I begin work on a new project, it can really take a while to move off the landing pad. I found this to be particularly true when I wrote my Fast-Track to Photoshop e-Book, which actually took me about two years. Most of it was a sense of procrastination because each time I approached it, I felt I was tackling it from the wrong perspective.

A work in progress. It's better to release something when it's right. It may be some time yet :-)

A work in progress. It's better to release something when it's right. It may be some time yet :-)

I'm a great believer in sleeping on things if I don't know the answer. Backing off from something and giving my mind the time to collate and make sense of something works really well for me. I've found that adopting this approach to my photography, as well as writing e-books and also in life experiences, has been invaluable.

I found that just by leaving my 'Fast Track to Photoshop' e-book idea on the shelf for a long long while, I seemed to get clarity on how it should be formed, and when I did get round to writing it, it all came out very easily and I felt I wrote one of my most clear and concise efforts to date.

Well, I'm not there yet with my Tonal Relationships e-book, as I've been having difficulty trying to figure out how to proceed, but I've noticed that over the past few weeks I've started to formulate a structure for how the e-book should be laid out and things are getting clearer in my head.

One aspect that has become clear to me over the past few years, is that tonal relationships do not just have to work within each single image, but in order to help with defining your own style, I think the tones should remain consistent through any body of work you produce. For instance, I've noticed that when I convert my colour work to monochrome, I'm able to see how consistent my work is - strip away the colours, and the images still appear to be very balanced.

It was only when I converted some of my existing colour work to mono, that I discovered how consistent I was with my tonal ranges in my work.

It was only when I converted some of my existing colour work to mono, that I discovered how consistent I was with my tonal ranges in my work.

Anyway, I digress a little. Here right now, is a rough idea of how I feel the e-Book may be laid out. I'm always open to things changing, and trying to not be too fixed on things, because creativity needs the space to go where it wants to go.

Main ideas of book:

  • Relationships throughout the frame - by strengthening one area of the frame, other tones are affected
  • If you make two areas of the frame the same tone - they become related.
  • If you make two areas of the frame different, they become unrelated.
  • The odd tone out is the dominant one. If you keep one area of the picture different from the rest, it becomes the dominant tone. White stone on black background, or black stone on white background

Fieldwork Awareness Section

  • learn to think about tones while out making pictures: abstraction versus association
  • being aware of colour constancy / chromatic adaption while you work under different lighting conditions, and applying this to your choice of subject
  • Avoiding overly complex tonal compositions

Darkroom Workbook Section

  • Transposing Tones - take one tone in the image, and shift it (harris hills in harris photos)
  • Look for images in your collection that have very few tones. Edit them so all the tones become more similar
  • Simple compositions aren’t necessarily of one or two objects. Sometimes they are simple because they contain one or two dominant tones. Busy images can have too much tonal information in them. 
  • Image selection: choose those with simple tonal relationships, because it will make the task of editing them easier.
  • image selection: when toning one image, refer to others in the collection for guidance. Often one image will dictate how the others should be edited, so they 'sit together' better.
  • Is your eye being pulled all over the place by too many tonal distractions? Apply localised contrasts, or reduce contrast in other areas to bring emphasis to other areas.

Using tonal relationships to connect the inside with the outside

I think there are a lot of parallels between the world of photography and that of the world of painting.

I found this video today on YouTube which I felt has just as much validity in teaching us photographers something, as well as it's intended audience of painters.

The video deals with the art work of Winifred Nicholson. She was a beautiful painter of still life's that she painted from inside looking out. I've enjoyed her work for many years since I first found out about her while on the Isle of Eigg here in Scotland. Winifred visited the island several times and made many paintings whilst there.

Candle, Isle of Eigg. Painting by Winifred Nicholson (1893 - 1981)

Candle, Isle of Eigg. Painting by Winifred Nicholson (1893 - 1981)

Anyway, I digress a little. In this video we see that Winifred was very clever in allowing us to know that she was painting from inside a house looking out, but manages to avoid showing us the window. But more interestingly, as she developed her style, she started to incorporate the inside of the house into her paintings, but she did so by managing to make the inside feel 'related' to the outside. She did this by clever use of tonal relationships.

In her earlier work, the quality of light within the house is different from that of outside - thus creating a divide. As viewers, we do not feel so connected with the outside. Whereas in her later work, she was clever in making the quality of light and tonal responses inside and out similar, therefore relating the two, and ultimately bringing the outside into our viewing space. 

I've been thinking about tonal relationships for a long while in my own work, and I find that when I make two objects in the same frame tonally similar - they become highly related. Conversely, when I make two objects in the same frame tonally dissimilar, they become less related. 

Well, this video illustrates this point very neatly, particularly in the last image where we see that Winifred uses a couch inside the home as context - something for us to begin from, and then through the similarity of light and tone inside and out of the house, invites us to reach outside the house where the outside feels like an extension of the inside.

Although it's discussing paintings, I think there is always much to be learned about photography through the world of painting. I hope you get something from this short video.

My first Digital Darkroom Workshop

I'm just home from leading my first ever "Fieldwork to Digital-Darkroom" workshop, which entails marrying what is done out in the field with the post-edit stage. My course is based on my e-book - 'The Digital Darkroom - Image Interpretation Techniques'

Still very much a work-in-progress e-book, but I feel I'm getting a better sense of what should be included now that I'm teaching digital-darkroom interpretation skills.

Still very much a work-in-progress e-book, but I feel I'm getting a better sense of what should be included now that I'm teaching digital-darkroom interpretation skills.

The course was run at Adrian Hollister's Open Studio environment in the north-west of Scotland. Adrian runs many workshops with such notables as Joe Cornish, David Ward, Eddie Euphramus and the wonderful Paul Wakefield. His studio has six iMac computers, all colour calibrated and it's on the door-step of some wonderful landscapes which are within a 30 minute drive. Perfect venue for running such a workshop.

I've been wanting to run a course like this for a very long time, because I feel that the editing stage is often considered as an almost secondary, isolated task, something that is unrelated to the capture stage. 

Adrian Hollister's Digital Darkroom Studio, Mellon Charles, Wester Ross, Scotland

Adrian Hollister's Digital Darkroom Studio, Mellon Charles, Wester Ross, Scotland

I firmly believe that the fieldwork and editing stages are interrelated. Our editing sessions teach us about things we didn't notice at the time of capture and they illustrate to us what we need to be more aware of in future - if we choose to make the connection! Similarly, once we know how far we can push and pull images in the digital-darkroom, we are in a more informed position whilst choosing certain subjects, contrasts and qualities of light. There is a symbiotic nature between the two, and so for me, the word 'post' as in 'post-process' discourages our thinking into believing both tasks are unrelated, when they are not.

In fact, I abhor the phrase 'post-process' because it makes the entire editing stage sound like a functional, emotionless act. Images become something you could just stick in a washing machine, turn a few dials and let it run on auto. Which isn't the case. Editing requires much awareness - of tonal relationships, of competing elements, of flow throughout the image.

And adjustments made in the digital-darkroom should be made whilst noticing how our emotional response is affected when we change tones and contrasts in the work. It is much to do about 'feel' as it is to do about technology.

So I made a point that this week's workshop would not be about teaching photoshop, or teaching Lightroom. Anyone can do that in their own time, and that kind of knowledge is easy to get. No, what I wanted to teach was how to interpret what you've captured - to see and take advantage of themes present within the composition, to notice tonal relationships between subjects within the frame, to see that each image has an underlying structure that almost spells out how it should be edited to bring these motifs further forward. 

The digital darkroom is a creative space, one where we can bring out the essence of the motifs we discover in the image. That's its primary function for me. I do not see this as a way for fixing bad images. A bad image is always a bad image. We have an expression here 'you can't polish a turd'. Instead, I see it as a way to bring out the beauty and essence that can, with a bit of interpretation, be found in a good image.

But interpretation is a skill, and like composition, has to be earned and improved over the lifespan of our involvement with photography. There is no manual for this, just an improved ability to read an image, to understand what is going on, and to know your toolkit (software) well enough to be able to bring forward your interpretation.

So I was curious to see how my group of participants would edit their work after five days of guidance and continuous feedback. I definitely saw improvements in most participants work. Certainly in the daily reviews I would notice that all of the participants had observations and awareness of what might be done to help remove distractions, or bring out themes within the work, but what I had not envisaged was that some of the group would be far too subtle with their edits and I think there are a few reasons for this.

Firstly, each one of us has our own aesthetic. We have our own tastes. Some photographers are more interested in the verbatim. What they see out in the landscape is what they want to capture, and so the edits will be done with a lot of sympathy for how they perceived their reality.

Secondly, some will under-edit because of a lack of objectivity. Ideally we need a few weeks between capture and edit. I always find that if trying to edit work straight away is hard because we're so often attached to an idea of what we wanted to convey and if the image is not successful in this regard, we may feel it is not a success. Leave it for a few weeks and you will come back to it with a fresh eye. If there are any motifs of themes within the image - you're more likely to work with those because you're more open to see other things where you were not at the point of capture.

Thirdly, I think under-editing happens through a lack of confidence. Too scared to adjust the image too much because the photographer feels they don't have enough skill to know what to do. But I also think it may be because they feel they may lose something in the process, and could be holding onto how the image looks now, and can't see beyond that to another destination.

It's this that interests me most and I must confess that I feel there is no clear answer. Editing is a skill that is derived from many years of self-improvement. If I look back at my own editing abilities, and consider images I shot 10 years ago, I can see that often I knew there was something missing in an image, but I couldn't put my finger on what it might be. I see tonal errors in them where at the time of edit, my abilities were so untuned I thought I saw beauty. Where I was perhaps overcome by the strong colours of my chosen film, I now see a clumsy edit.

Digital-darkroom skills take a lifetime of continuous self-improvement. We have to put the work in. But we also have to be smart about it. Simply cranking up contrasts or saturation across the board is a clumsy way to edit work, and it should be something that doesn't happen so much as it did when you began your editing career. But things only change if you take the time to consider and reflect on what might be the best way forward to edit your work, and self-awareness is something that has to be built upon over time.

I found my Digital-Darkroom workshop did help my participants. There were moments where I felt I had led my horses to water, only they were unable to drink, because if they can't see it themselves, then I can't force them to. Improving editing skills can't be rushed, but certainly a week in the field and behind a computer with a photographer you like the work of, may help bring about an improved sense of awareness, and that's what I believe happened this week.


Something in-between Sunlight & Shadow

For a long while now, I've been fascinated by the power of suggestion over a more literal interpretation. I was initially attracted to this aspect of photography through the work of Michael Kenna in the late 80's. His use of shadows and night often convey a sense of mystery or at the very least mood to his imagery.

Just recently, I found out about Ray Metzker, who passed away last year. His work conveys similar concepts to Kenna's. He was interested in suggestion rather than a literal translation. His use of sunlight and shadow to conceal his subjects often lent his work a sense of mystery.

 Solitary pedestrians and urban spaces transformed by sunlight and shadow. Image © Ray Metzker

 Solitary pedestrians and urban spaces transformed by sunlight and shadow. Image © Ray Metzker

Suggestion is a powerful tool to possess as a photographer - because being able to get your audience to stop and listen to what you are doing often happens through the art of suggestion.

 In Ray Metzker's images, he shows tremendous skill in using sunlight and shadow to convey mystery. What may have otherwise been an ordinary scene becomes more interesting and thought provoking when shade is used to conceal or reveal.

Ray would produce portfolios based on these tonal suggestions rather than by subject matter. This resonates with me because I feel I have been doing something similar; for a while now, I have been choosing images where they are related either by tonal response or by colour palette.

Ray Metzker's use of sunlight and shadow was masterful. Image © Ray Metzker

Ray Metzker's use of sunlight and shadow was masterful. Image © Ray Metzker

To explain further, I find Iceland to be a monochromatic place: black sand and white ice. Bolivia is about blues and reds: the lagoons of red sediments and the salt flats at twilight intertwine to offer up a particular colour palette. So I tend to go looking for subjects that fit together tonally or by colour - as a collection. These two places are responsible alone for me branching out into monochrome work. They have taught me that the portfolio - the whole is greater than the sum of its parts.

I see a similarity in Ray Meskier's work where he chooses subjects that are collected together by tonal similarities. People in the city often photographed as silhouettes, or with their identities concealed by use of shadow strengthen his portfolio as well as lend a very decisive look.

Images don't always have to utilise the full tonal range. Here Ray Metzker uses mostly shadow to mid-tones only. I find the deliberate concealment of the people's faces adds further mystery to the image. Image © Ray Metzker

Images don't always have to utilise the full tonal range. Here Ray Metzker uses mostly shadow to mid-tones only. I find the deliberate concealment of the people's faces adds further mystery to the image. Image © Ray Metzker

His work has a style - something that we are all trying to develop or bring forward in our own work. And this is perhaps the most important lesson from looking at this work: it's clear that Mezkier has thought about the aesthetic qualities of his final selection of images and also the subject matter in such a way that we are clear each photograph is by the same author.

I learn a lot by looking at work that I find inspiring. It doesn't have to be landscape related for me to 'get it'. I just have to find a connection in the work - to see something that I find intriguing, or that makes sense to me in some way that I hadn't thought of. With Ray Metzker's work, I do exactly that. I learn about image selection based on using tonal responses but I also learn that his choice to make people very anonymous or to conceal their identities through his use of shadow and sunlight can lend the work a thematic quality which goes a long way in conveying a photographic style.

And sometimes it's the sudden split between shadow and sunlight that throws a contrast; like two images spliced together, providing a sense of tension between the two subjects in the frame. Image © Ray Metzker

And sometimes it's the sudden split between shadow and sunlight that throws a contrast; like two images spliced together, providing a sense of tension between the two subjects in the frame. Image © Ray Metzker

And then there are his choices in composition. I've always thought that street photography has less to do with aesthetics and more to do with narrative. But in Ray's work the story is missing. He has deliberately chosen to conceal most of his subjects so we know very little about them. Instead we are presented with compositions constructed through form and tone only. They are like landscape studies about the people in a city.

A study of graphic qualities. Image © Ray Metzker

A study of graphic qualities. Image © Ray Metzker

A Stark Beauty

Wishing for the golden rays of the sun to come and light up the landscape may be something that we all aspire to. But I believe that having this aim in mind isn't necessarily always a good thing.

Geothermal, Black Deserts & Ice hugging

Geothermal, Black Deserts & Ice hugging

Some landscapes are muted in colour by nature. I think this kind of understated tonality has a beauty to it - one that we as photographers need to embrace when we encounter it.

I think the central highlands of Iceland is one such place. It can be stark, bleak and yet it is a beautiful thing to witness. I can however, fully understand that to many, words such as 'stark' and 'bleak' could be construed as meaning 'ugly' or 'unwanted'. 

As a landscape photographer who has had a great deal of interest in vibrant colours, I have to say that there has been a subtle change in what I do over the past years - not just in how I edit my work but also in what I am looking for in the landscape. I think this has been an evolutionary thing for me. These days if I encounter a landscape that is devoid of colour, I think I'm more willing to accept it for what it is. I now see a kind of beauty where perhaps years ago I wouldn't have and as a result, i'm more comfortable representing it in all its muted, monochromatic glory.

For me, I think that's one of the reasons why I'm so captivated by the central highlands of Iceland. It's there that I'm confronted with oblique shapes and unconditional tones of muted grey. It is what it is and it can't be forced to be something else.

Natural & Hydro Powered Landscapes

Natural & Hydro Powered Landscapes

For instance, some of the deserts appear to be devoid of colour. They are almost absolute black. They can't really be conveyed in any other way than their stark quality. And It's in this immensity of constant 'nothingness' that I've been drawn in. It's like I'm looking for something underneath, something just out of sight that  I know is there. Each photograph I take, is an attempt to convey that, yet each time I feel I'm just scratching the surface.

I think some landscapes offer us many lessons. They are places in which we can grow. But we have to be receptive to them. I've often said that visiting a certain landscape in my own photographic development has been key to showing me the way forward. The emptiness of the Bolivian Altiplano for instance has taught me how to simplify my compositions, and it also taught me a thing or two about tonal relationships. But I had to be receptive, I had to be willing to listen.

And there are some landscapes which we visit too soon in our development. We struggle to find something to work with or it's just plain too hard to do anything with them. I'm convinced these kinds of landscapes do have a lot to offer, but the timing is wrong - we're just not ready for them yet.

A mesmerising vastness of black deserts and moss.

A mesmerising vastness of black deserts and moss.

Approaching a difficult landscape like the central highlands of Iceland has many obstacles to overcome. For me, I've had to overcome my own set of self-imposed restrictions. I'm aware that I do have them - whether they are conscious or unconscious.  Do I, for instance, only strive for golden warm light and disregard other kinds of light as a possibility? And should I only ever shoot when it is dry and never take the camera out when other atmospheric options show opportunities?

By placing these kinds of restrictions upon myself, I do a disservice to my own creative side but I also show a disrespect to the landscape for what it has to offer me.

The landscape is always providing, always giving something of itself. It speaks, it converses with me, it shows me what it is. This I know for sure. It's just up to me to choose whether I wish to listen to it or not.

As I said earlier on - landscapes teach us things about ourselves. An oblique landscape such as the central highlands of Iceland has taught me that If there is anything holding me back with my photography, then it is most probably me.

Josef Albers - Interaction of Color

I've been saying for a while now, that digital-darkroom skills take a lifetime to master. It is a continuous journey of self improvement. Simply buying a copy of Lightroom or Photoshop and learning the applications may give us the tools, but it does not make us great craftsmen. We need to delve deeper than simply adding contrast or saturation to our images to truly understand how to get the best out of our editing and to move our photographic art forward.

Josef Albers fascinating 'Interaction of Colour'. It's quite an old publication now, but it's great for getting a better grasp of colour theory.

Josef Albers fascinating 'Interaction of Colour'. It's quite an old publication now, but it's great for getting a better grasp of colour theory.

Lately, I've been taking more of an interest in tonal relationships and more specifically, the theories behind how we interpret colour. It's something that has grown out of my own awareness of how my digital-darkroom interpretation skills are developing.

Simply put, I believe we all have varying levels of visual awareness. Some of us may be more attuned to colour casts than others for example. While others may have more of an intuitive understanding of tonal relationships. 

Ultimately, if we're not aware of tonal and colour relationships within the images we choose to edit, then we will never be able to edit them particularly well. I think this is perhaps a case of why we see so many badly edited (read that as over-processed) images on the web. Many are too attached to what they think is present in the image, and there's a lack of objectivity about what really is there. 

So for the past few weeks I've been reading some really interesting books on the visual system. In Bruce Frazer's 'Real World Colour Management' book for instance, I've learned that our eye does not respond to quantity of light in a linear fashion.

An overly-simplified illustration. It demonstrates that the human eye is not able to perceive differences in real-world tonal values. Our eye tends to compress brighter tones, which is why we need to use grads on digital cameras, because their respo…

An overly-simplified illustration. It demonstrates that the human eye is not able to perceive differences in real-world tonal values. Our eye tends to compress brighter tones, which is why we need to use grads on digital cameras, because their response is linear, while our response is non-linear.

We tend to compress the brighter tones and perceive them as the same luminosity as darker ones. A classic case would be that we can see textural detail in ground and also in sky, while our camera cannot. Cameras have a linear response to the brightness values of the real world, while we have a non-linear response.

Similarly, when we put two similar (but not identical) tones together, we can discern the difference between them:

Two different tones. Easy to notice the tonal differences when they are side by side.

Two different tones. Easy to notice the tonal differences when they are side by side.

But when we place them far apart - we cannot so easily notice the tonal differences:

Two different tones, far apart. Their tonal difference to each other is less obvious.

Two different tones, far apart. Their tonal difference to each other is less obvious.

Our eye is easily deceived, and I'm sure that having some knowledge of why this is the case, can only help me in my pursuit to become more aware of how I interpret what I see, whether it is in the real world, or on a computer monitor.

Josef Albers fascinating book 'Interaction of Colour' was written back in the 1950's. I like it very much because it:

"is a record of an experimental way of studying colour and of teaching colour".

His introduction to the book sums up for me what I find most intriguing about how we see -

"In visual perception a colour is almost never seen as it really is - as it physically is. This fact makes colour the most relative medium in art".

Indeed. How a viewer of your work may interpret what your image says may be totally subjective, but there are certain key physical as well as psychological reasons for why others are relating to your work the way they do. But most importantly, if we don't 'see it' ourselves, then we are losing out during the creative digital darkroom stage of our editing.

"The aim of such a study is to develop - through experience - by trial and error - an eye for colour. this means, specifically, seeing colour actions as well as feeling colour relatedness"

And this is the heart of the matter for me. I know when I edit work, that sometimes I need to leave it for a few days and return later - to see it with a fresh eye. Part of this is that I am too close to the work and need some distance from it, so I can be more objective about what I've done.

But I also know that I don't see colour or tonal relationships so easily. I need to work at them. I am fully aware that I still have a long way to go (a life long journey in fact) to improve my eye. And surely this is the true quest of all photographers - to improve one's eye?