Square Variations

Today I feel like posting an old post. The post below was written in 2012. I feel it’s just as valid now as it was back then. Today I’ve been talking to a few people about aspect ratios. Since I wrote this piece, I’ve seen a few camera manufacturers offer more aspect ratios in their cameras, but it’s still not enough. Aspect ratios should be programmable on all contemporary cameras. It should also be implemented in a way that works without it being a bit of an afterthought (Canon, Nikon). Through the more recent introduction of mirrorless cameras, some have embraced aspect ratios (my favourite is the Fuji GFX50s which has just about every conceivable aspect ratio available, and it can be programmed as a dedicated button on the body).

Anyway, I hope you enjoy this article about me shooting images in Scotland.

Enjoy, Bruce.

April 2012

This past weekend, I was in Torridon conducting a weekend workshop. We had some very rainy weather, and one of the group - Steve - mentioned to me that he was glad the weather had been bad, as it gave him a chance to see he could actually make some good images despite the weather.

Top right

Top right

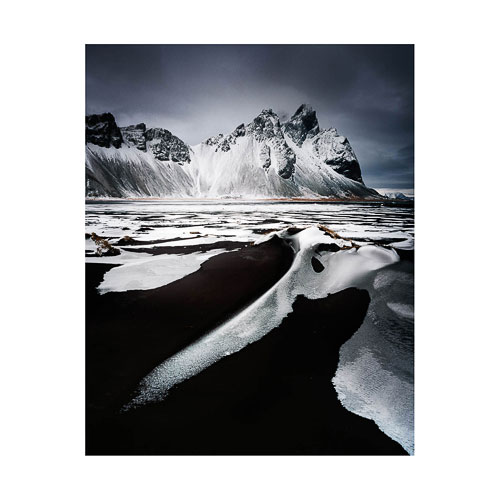
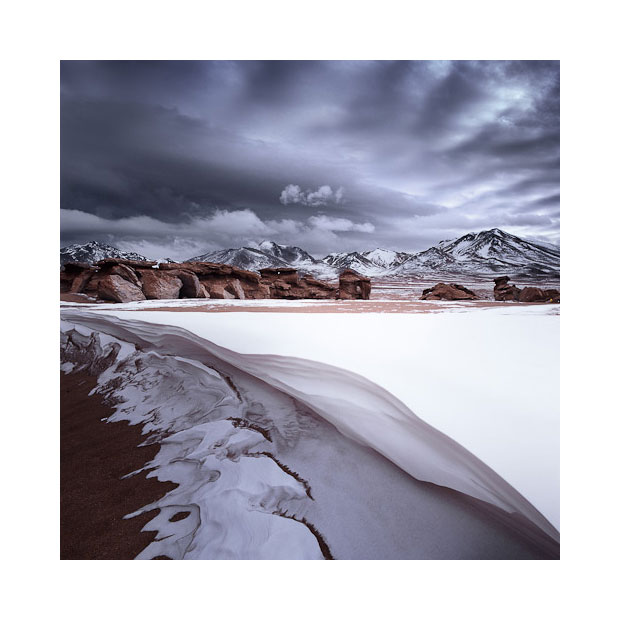
I often feel, that the reason why Scotland is so photogenic, is because of the changes in the weather. One minute it's misty, the next it's clear. And fog or low cloud levels can be a great way of making simpler images. Take the shot above for instance. This is Loch Maree. Normally, this group of trees have the massive Slioch mountain dominating the background. But with a bit of rain and poor visibility, Slioch was invisible. We were left with no horizon - nothing to give the shot context.

I loved the group of three or four trees clumped together. They were actually a subset of a larger group of trees, but I felt that we could easily 'remove' the rest and keep the entire shot very simple if we just had this small gathering of trees.
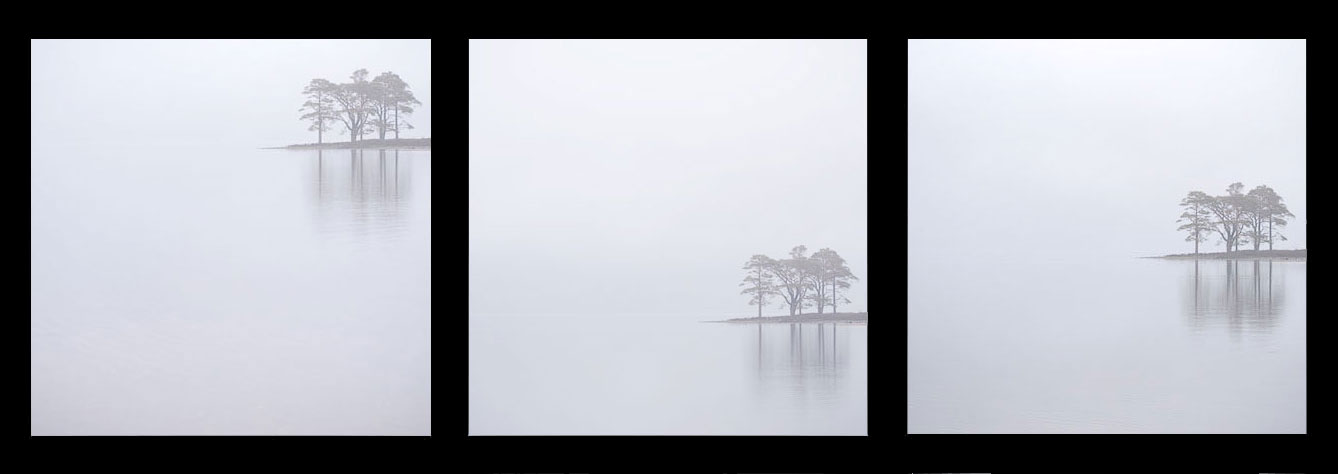
Variations

Variations

I made this shot on my little Lumix GF1. It's a great camera because it has interchangeable aspect ratios. I felt that square worked really well for this shot, as I could easily place the trees in three quadrants of the frame - top right, bottom right and middle right, as you can see in the above triptych. Question is, is one better than the other? And I like to consider that there is always more options than just one. So I guess the answer is 'it depends'. My personal favourite composition out of the three images is the first one. I feel the picture has a more 'uplifting' feeling than the rest, and it has more presence, because I'm really exaggerating the empty space in the frame more than the others. I also love the reflection of the trees.... I feel they have space below them to 'breathe'.

The middle composition, where the trees are placed in the bottom right, is perhaps less engaging for me, because the trees aren't so tight against the bottom of the frame. The picture feels less focussed for me, in terms of composition. I'd liked to have moved the trees even further down the frame, but I felt the reflections would not have enough space. I felt I had to keep moving the trees further up the frame. But it's a more relaxed composition than the first one - which I feel is more 'graphic' than being a photograph.

The far right composition is perhaps my less favourite. It is more of a 'standard' composition. I feel the horizon has been carelessly composed - for my taste. It's just a little below centre, and I think it might have benefited from being slightly above centre - giving that 'uplifting' feeling I was talking about in the first image, while at the same time, being more in-line with a 'standard' landscape image.

As much as I love square, maybe it might have suited more a 4x5 aspect ration as seen above?

4x5 crop

4x5 crop

Ultimately, when you have a simple subject such as this - trees and reflection, and nothing else, it's much easier to get down to the basic tasks of composition and placement in a frame. The less objects you have in the frame - the better, I feel.

I was immediately attracted to this scene when we were driving past, because there's little in there to distract. When was the last time you went out with your camera to shoot when the atmospheric pressure is so low, that almost nothing is visible?

Photographing in inclement weather

Cameras can take rain, so long as they're not left in a damp bag for days afterwards, that way they will die for sure. Cameras don't need to be weather sealed to be used in the rain, they just need a bit of sensible looking after, and taken in and dried once you're done. I've yet to have a camera die from rain water. They die because they're left in damp bags for too long.

Fjallabak-Sept-2017-(8).jpg

If you only photograph when it's dry, then you'll be extremely limited to the kinds of photographs you can make. Your photography will only show a narrow view of what the world has to offer and you'll be selling yourself short.

If you are worried about taking that $3,000 USD camera body out in the rain, then you've bought the wrong camera. Buy something you can take everywhere and not worry about. Better still, buy a used cheap body and abuse it.

Cameras are tools to be used. They should never stop you from making images and if they do, I'd suggest you get rid of them and buy something else that doesn't get in the way. That goes for cameras that are too complicated to use, or are too delicate for a bit of rain.

I'm lucky that I use old Hasselblad film cameras. They are 100% mechanical. They are inexpensive to replace if I break them. I've broken a few in my time because of the elements I work in. Sometimes they begin to rust inside due to all the salt air, or the fine sand of the Bolivian deserts cause wear and tear. The volcanic dust in Iceland can be particularly harsh also. But I'm never worried about them because at the end of the day - it's the photos that matter. I don't want to be held back by worrying about looking after the camera equipment.

Fjallabak-Sept-2017-(13).jpg

But before you think I don't care about my equipment, I'd like to tell you that I'm a gear head. I love photography equipment, and I do like to look after it. I just think photos matter more and so I do push them and use them in sandy, dusty, rainy places.

To clean them, I use a paint brush - 1 inch wide DIY store paint brush to get all the muck and dirt off the body. Blower brushes are pretty useless and when you have wet sand on a body, I'll leave it to try and then use the paint brush to wipe the sand off. It works beautifully.

So I do try to look after my equipment, but I also am not afraid to use it either.

Electronic cameras can take more rain water than you might imagine, but if you're not sure, then I suggest buying a cheap body to go out with. If you get those moody shots you want, then I think you won't look back, even if the resolution of the cheap digital body isn't anything close to your new camera.

The shots made in this post today were made in very foggy weather or in the middle of heavy downpour. The rain was so heavy that everyone else had retreated to the car. There was fine volcanic dust being blown around by the wind and it got into my camera bag, and into the body of my Hasselblad. I got soaked and the black sand of the desert began to stick to everything - my hands, my clothing and the outside of my camera equipment.  I was in my element though, as I knew I could not get these pictures of the desert any other way.

Use your equipment, and take it everywhere. Buy equipment that you're not afraid to damage, because it will also buy you  the freedom to experiment and work in all climatic conditions.

Delving deeper

It's good to get to know a landscape. Well.

Cono de Arita, Puna de Atacama, April 2017
Image taken by my guide on his Samsung phone. My films won't be ready until the very end of May !

I've been back in the Puna de Atacama region of Argentina this past week making some new photographs. My first visit here was two years ago. It was only a fleeting six day visit to the area where I felt I was often in the wrong place at sunrise and sunset. Despite being pleased with my first efforts, the experience left me feeling I had only scraped the surface of this amazing place. So many locations were wonderful but I was often there during the middle of the day when the light wasn't good. This is often the way with visits to new places: the first visit is more about finding out what it is I want to photograph and the second visit is about photographing it!

I like to get to know a place well, and repeated visits are the only way to do that. I see photographing a place like a continual learning experience where I hopefully grow in terms of my understanding of the place, as well as in my photography.

Logistics are often the biggest obstacle in getting to photograph a place well. With the Puna de Atacama, the region is vast. So vast in fact that my first visit left me feeling frustrated because in the space of a mile or so, there would be so many locations that would be suitable for the brief 20 minutes of beautiful light at either side of the day. With only 20 minutes to play with before the light would be bleached out at sunrise, and only 20 minutes to play with before the light was gone in the evening, it made choosing locations very tough indeed.

On location in the Puna de Atacama desert, Argentina, April 2017

So this visit was more about finding those special locations, areas where I wouldn't have to move so much to capture different aspects of the landscape before the 20 minutes of beautiful light was gone. That meant a lot of day-time scouting and many hills were climbed to find vantage points where I would have better luck when the light was good.

Spot-metering the desert in Argentina, April 2017

Location scouting seems to be a trial of errors. Working out where the sun is going to be and how it might react with the landscape can be done to some degree with Stephen Trainor's wonderful TPE application, but there still needs to be a lot of walking and climbing done to find those beautiful compositions where shapes in the landscape form the symmetry and balance I'm seeking.

Indeed, standing still in one location that is (hopefully) the best spot I can find, sometimes reaps dividends. With the Cono de Arita (the volcano shot at the top of this post (made by my guide on his Samsung phone), it was a learning experience to see how the shadows of the surrounding mountains interplayed with the salt flat and the silhouette of the cone as the sun dropped behind the horizon.

I believe it is only by spending time, and observing how the light interplays with the landscape that I can truly learn to be a better photographer. To obtain the images I want, I need to put the effort in, and that often means re-visiting a landscape many times over. Indeed, any landscape that I fall in love with will often become a regular part of my yearly photography because it has the capacity to teach me so much.

Success Rate

Ansel Adams said if he was able to make one good image a year that he liked,
he was doing well.

I'm very much in agreement with the sentiment behind Ansel's statement as I'd personally prefer to produce a very small quantity of high-quality work, than a lot of average images.

I've been thinking about how I dislike the terms 'hit-rate' and 'success-rate', as I feel that measuring one's own creativity is a destructive thing to do. Instead, I prefer to just be aware that my creativity has an ebb and a flow to it. For instance, I've found since I started this website way back in 2001, that I only manage to add a hand-full of images a year to it. But each time I do go to look at my archive work and recent work sections, I'm very aware that the work has taken a lot of time, patience and effort to create. 

I'm not that prolific and I as I see it, there are a few factors at play that determine my output.

This image wasn't planned, nor did I ever think I would make an image of Flamingos. But by returning again and again to a place, I can often find that things happen - wonderful things :-)

This image wasn't planned, nor did I ever think I would make an image of Flamingos. But by returning again and again to a place, I can often find that things happen - wonderful things :-)

Firstly, I have my own sense of what I feel is acceptable. I call it my 'in-built-quality-control', and it's what I use to determine whether an image is good or bad. Hopefully, I'm not too harsh on myself (by setting the bar unrealistically far too high), nor too easy on myself (by being happy to publish everything I do). Quality control is vital in understanding yourself, where you are artistically and for ensuring that others get a clear picture of how you see yourself.  I'd like to suggest you read this article of mine, which I wrote about the final selection process where I started out with around 400 images and filtered it down to around 30 or 40 I was happy to publish.

Secondly, I don't measure myself based on any success rate. I don't measure myself at all as I feel it's an unhealthy thing to do. Instead I accept that my creativity has its own natural flow which I can't control. None of us know when we are about to create our best work, nor our worst. A good photographer is open to new things coming in and to letting go of things that don't work, otherwise it's possible to become stuck.

I also understand the value of creating bad work. To get to the good work requires experimentation and an openness to try things out which may fail. Exploring the possibilities of one's own creativity requires us to be able to deal with failure because there will be many failures along the way. But rather than using the word 'failure' though, I would prefer to use the word 'experiment' or perhaps 'work in progress'. It's a much more constructive way to look at work that didn't meet your own standards. Our work is never finished anyway - we are always in a constant state of change.

The difficult to photograph Cerro Torre in the northern part of Los Glaciares national park, Argentina. This is perhaps the image I spent most energy on getting. I had visited this area several times over several years, often coming home with nothin…

The difficult to photograph Cerro Torre in the northern part of Los Glaciares national park, Argentina. This is perhaps the image I spent most energy on getting. I had visited this area several times over several years, often coming home with nothing - the place is so famous for its bad weather. I've had so many emails from readers who told me they saw nothing when they were here. Well, I camped here once for more than a couple of weeks and I saw nothing too.... but I kept returning and I got this shot for a brief 5 minute window.

Lastly, but perhaps most importantly, I understand that good work is the culmination of many things such as time, effort and patience. A good portfolio is not created overnight nor with little effort. Instead, good work is accumulated gradually over many years, with a lot of of experiments along the way and with a lot of perseverance. I also find that living with the work for many years allows me to have a sense of distance which brings a certain level of objectivity and awareness. I am always considering and reconsidering my older work. It allows me to notice changes within me.

So I think 'success rate' is a poor demonstrator for my art. I prefer not to think about this because everything I do, right from the experiments to the keepers - is all part of the creative process. Creative work should never be measured, instead it should just be allowed to flow in its own way and under its own pace.

The Philosophy of Returning

I'm in Nepal just now, just passing through Kathmandu on my way to Bhutan. It's a 'family' trip this time - with my dad and brother, but I've brought my cameras along, hopefully to make some new images of the people of Bhutan while I am here.

A very rare and special encounter in the UNESCO town of Baktapur in the Kathmandu valley yielded this image for me in 2009.

A very rare and special encounter in the UNESCO town of Baktapur in the Kathmandu valley yielded this image for me in 2009.

I spent today going back to some old haunts. One in particular - the Boudha Stupa in the Tibetan area of Kathmandu was a special place for me back in 2009. So much has changed in the past six years for me since that trip that I couldn't help being a little reflective today about it. I found myself remembering who I was at that time, and what I was looking for as a photographer.

I've always felt there is a great deal of value to be found in returning to a location more than once. In fact, many of the landscapes I have photographed, I have gotten to know over many years and by returning many times. Some offer up their secrets upon the first visit. I may find that the first encounter is so special that an impression remains indelibly marked on my psyche for many years to come and seems to be the benchmark for all further visits. Most of the time though, I feel that each visit allows me to learn a bit more about a place, and understand it better. I also find that each new encounter yields different images.

The adage that you can't repeat what you did is often true, and going back somewhere to try to reproduce a certain look, mood or feeling just doesn't happen. You change. The location changes. And new things are brought forward as a result.

A woman I encountered many times at Boudha Stupa in Kathmandu in 2009, but it took me about six days to work up the courage to get in close and make this photo of her.

A woman I encountered many times at Boudha Stupa in Kathmandu in 2009, but it took me about six days to work up the courage to get in close and make this photo of her.

Being here today, I noticed that the Boudha Stupa has not changed, and it is still a remarkable site to encounter, particularly in the morning when it is covered in birds and all the local Tibetan's come to do their early morning prayers. But what has changed is that there are fewer Buddhists / Tibetans and Hindu's in traditional dress. In fact, the majority of the people I saw this time round were dressed in western style clothing. I am reminded today that the old pass away and the young replace them. The only thing constant in life it seems,  is change.

I didn't feel like making pictures today though, despite the Stupa being very beautiful, I felt I had more or less 'said it' back in 2009 and today has reminded me that what I managed to capture back then, was the product of about 12 mornings of repeated visits, hoping to find a new nugget that I had not been presented with on previous days. In short, what I got, was the product of hard work.

I feel today that I've been given the rare gift of being allowed to appreciate my work in a new way. At the time of making these photographs I felt I could have done better. But returning today, I now see that the place is hard to photograph. The people who come here to pray do not wish to deal with a photographer asking them for images.

The Boudha stupa at dawn. Many birds frequent the place in the morning during prayers. A more traditional dress sense was evident back in 2009, and seems to be more 'rare' now in 2015.

The Boudha stupa at dawn. Many birds frequent the place in the morning during prayers. A more traditional dress sense was evident back in 2009, and seems to be more 'rare' now in 2015.

But I also feel that I have no desire to photograph this place any more. I just feel I am content with what I got back in 2009 and there's no need to try and add to it.

So if I have any specific point to make today, it is perhaps that returning to a location can sometimes make you reflect, and give you the opportunity to notice how you've changed as a photographer. I feel I am looking back at who I was in 2009 and noticing where I am now.

Maybe some places need to be returned to only a few times. Like a special event in life, that one cannot repeat again, it's perhaps best to just remember it and cherish it for what it gave you at that moment in your photographic development.

My original images of the Kathmandu valley mean more to me now, since I have returned. My shoot in 2009 was a special moment in my own photography-life and I'm grateful to have had the opportunity to reconnect with it and reflect on how hard I had worked to create it.

And that's just great :-)

Lee Seven5 Filter System Review

For a very long time, I've used Lee 100mm neutral density filters in my landscape photography. Neutral Density filters are, I feel, a vital piece of kit that all landscape photographers should own. The Lee system is in my experience the best you can get. I feel I can say this with some authority as I've had the privilege of working with all the filter manufacturers products over the past six years I've been running workshops.

Most pro-end filters are perfectly fine in terms of optics and colour rendition, but I've found many manufacturers products fall short in terms of filter holder design (i.e lack-of) or in being used in a compounded fashion - stack more than one filter together and an evident magenta colour cast will surface. It's always there, but it varies from manufacturer to manufacturer. I have however, found the Lee filter system to be the least prone to colour casts, provided that the filters haven't aged. It's unfortunately the case that all filters tend to lose the colour accuracy over time as the dyes begin to fade. All Lee filters are date stamped and they recommend you replace them every three years or so (this is usually a non-issue for me, as I tend to use them so much, that I wear our my gear a lot earlier than that).

ND (Neutral Density) filters are essential in controlling the dynamic range and exposure between ground and sky - not just with film, but also with digital capture. If you're uncertain about their benefit, then I can't state how important they are. Even the 1 stop Hard-grad is vital. But you do need to buy a good quality set. Don't cut corners by going cheap - you'll regret it.

Anyway, this posting is about the miniature filter system by Lee. It's called the Seven5 filter system. It's been designed for compact systems and the filters are therefore considerably smaller than it's big-brother 100mm filters.

I've been meaning to write a review of the Lee Seven5 filter system for some time now. This review is primarily aimed at those who are thinking of using this system with a small format camera system such as a Micro-Four-Thirds format up to 35mm rangefinder.

I bought my set of Seven5 filters because I was looking for a compact filter system that would work with a little Lumix GX1 Micro-Four-Thirds system I bought for illustrative and teaching purposes on my workshops. I'm not a digital shooter, preferring to work with film for all of the work you see on this website. So I wanted a small camera format that was very compact. The Lumix GX1 along with a Panasonic 12-35 lens is what I chose, and the Seven5 filter system fitted the bill in terms of compactness.

The good

It's really compact. I like the filter holder and the adaptor rings. The filter holder is especially simple and it comes with the polariser attachment already built in.

Which brings me on to the polariser. What I've always liked about the Lee system is that the polariser fits on to the front of the holder.Which makes it much easier to rotate while keep the grads where they are. The only downside in this approach is that the polariser needs to be a lot larger to avoid vignetting (which is a costly exercise as the filter for the normal system is 105mm).

The Seven5 polariser is easy to fit onto the holder in one short rotation. The 100mm filter system on the other hand requires you to thread the filter on and off. I've never liked this - so much so - that I bought two filter holders - one for general grad use, while the other has the polariser permanently attached. It's much easier to swap filter holders than it is to thread and unthread a filter from one holder. With the Seven5 system this problem has been removed all together - it's a simple snap and rotate to lock it on and remove it quickly too. Very nice.

The bad

Whoever designed these filters for use of smaller systems assumed that the diameter of the lenses would be smaller than those of 35mm lenses, which in most cases isn't true. I've used these filters on a Micro-Four-Thirds system for a while now, and they don't cover the entire area of the lens when you wish to place the grad around 3/4 of the way up the frame - particularly when composing in portrait orientation. It's not uncommon to find the filter is not long enough with the bottom edge protruding into the lower region of the image. I think this was a design constraint to keep the whole system compact, but it does impact their use.

The other thing that I find confusing is the degree of 'suddenness' of the graduation in each of the hard-grad filters. They're too sudden for systems such as Micro-Four-Thirds or even 35mm cameras.

I have some thoughts on why extremely sudden grads don't work with small-format systems.

Hard-Grad's tend to be more obvious on wide angle lenses than telephotos because when a shorter focal-length is used, we're really zooming-out of the image and are therefore zooming out of the graduation. If we go the other way and go up the focal-lengths, then we're really zooming into the graduation - so the graduation becomes more and more diffused as we zoom up. So using sudden graduations like the ones that Lee produce for the Seven5 system on systems such as Micro-Four-Thirds where the focal lengths are smaller - (for example - an equivalent angle of view to 50mm on MFT is 25mm), it becomes apparent that the graduations are going to be more evident.

I should at this point make it clear that I use hard-grads most of the time. They are used far more often than soft grads - which are really for use in controlling more gradual tonal changes across the entire frame rather than for controlling the contrast between sky and ground. So it's not that hard-grads are too sudden in per se - they're not - they usually work very well for most of the situations I encounter in my landscape work. I do get emails asking about the correct placement, but these questions usually hint at the wrong strength of filter being used - if you can see the graduation - it's probably because you're using too strong a filter.  Hard grads aren't too sensitive to correct placement provided the strength is about right.

One last thing, I wish someone would produce a nice little filter bag for the Seven-5 system. I don't see the point in owning small filters, only to store them in a large bag. It kind of defeats the purpose of going compact.

In Summary

So my two main issues with this filter system are this:  Using it with small format systems, the filters are often too short (have less travel than I need for grad placement) and the hard-graduations themselves are too obvious / sudden.

If you already own the Lee 100mm filter system, it would recommend buying these for one reason - if you feel going compact is of the utmost importance for you. I can fully appreciate that a compact filter system for Leica Rangefinder users and smaller formats is very attractive. It certainly was for me when I chose to buy these.

Although the 100mm filters are considerably larger and bulkier, the graduations and filter-travel are just about right for using on any system from Micro-Four-Thirds upwards, so again, i'd only opt for the Seven5 system if compactness is the driving force behind your need to buy them.

Despite these points, I'm still happy I bought mine and I've learned to live with the limitations of the filter system because for me, it's the compactness of the design that was the essential aspect of buying them in the first place.

Heading towards the edge? Then take your time.

A few months ago I posted an article about using focal lengths, and more precisely, how they can be used to control the balance or dominance between foreground and background subjects.Stoksness, Iceland

In it, I spoke about how it's not uncommon to be attracted to the edges of a landscape. For instance, I'll often find myself heading towards the edge of a lake, or the edge of the sea and I've also found myself on occasion close to the edge of a cliff.

If my habit is to always go straight down to the edge of the sea/lake/loch/cliff, this can be a real limitation in terms of controlling background and foreground dominance. As explained in my previous article about focal lengths, part of my technique in balancing foregrounds with backgrounds is by how near/far I choose to be to my foreground. Anything at infinity stays at infinity and does not change in size as I move ten feet forward/back but my foreground changes in size dramatically. By automatically heading towards the very edge of a lake, I'm reducing any opportunity to use this technique to it's fullest.

I'm also losing out in another way too though. I miss out on exploring the parts of the landscape that I pass over to get to the edge of the water. This is the main point of this post today.

I've often found many great compositions whilst on the way somewhere. I think this is because as much as I can latch on to one area of a landscape and feel it might be very interesting to work with, I actively keep my mind open to finding and noticing other things while I make my way towards it. I'm just wondering though - is this something you do when you choose to head from the car to a designated spot?

A little bit like a life-metaphor, I think we can often miss out on opportunities as photographers because we're too focussed on being somewhere else.

Siloli desert, Bolivia

These days, I like to start at the back of a beach and slowly work my way forward. I'm well aware that small areas of a landscape can yield interesting compositions and I'll often find myself working with an area of a beach which is around 4 feet long for an hour or so.

This is why I prefer prime lenses because they force me to fit to the landscape, rather than me command the landscape to fit to my own rules. With a prime lens, I'm forced to move around to fit things in, whereas with a zoom it's often too easy to feel I can just stay in one spot and change focal lengths to get everything to fit together. By doing the later, I miss out on finding new compositions in my immediate surroundings whereas with the  former, I'm encouraged to explore.

I feel good photography is not simply about technique or being there at the right time. But more about temperament - how patient/impatient I am, and how I tend to latch onto an area of the landscape and become blinkered and ignore the rest.

Self-awareness, of knowing how I can behave,  has become  a vital photographic skill for me. I know I can sometimes choose to close my eyes to many photographic opportunities. Just having this knowledge has helped me reconsider what I may be passing up on - particularly so when I'm heading towards the edge of landscape.

Thoughts on the impact of equipment change

This year I re-entered the world of the field camera. You may think this camera is a large format 4x5 inch system. It's not. It's actually a medium format 6x9cm field camera, only I'm using it with a 6x7cm film holder. So it's really a 6x7 medium format film camera with the added benefit of having tilt, shift and swing movements. Many Canon and Nikon users can buy tilt-shift lenses for their fixed plane camera bodies, for me, I bought a camera with tilt-shift-swing movements built into the body not the lenses.

Because it is not a large format camera, it's much smaller and lighter than you can imagine from looking at the photographs here. I just took this little system with me to Turkey a few weeks back and I carried it onto the plane in a waist-level bag including four lenses (38, 47, 65, 80), light meter, filter case and my entire film stock. I don't like to travel with multiple formats if I can avoid it - too many options make for a confusing time and I wished to get to grips with this system while I was away. There's no better way to do that, than to leave every other camera (read that as 'crutch')  back at home.

So why did someone who already owns three different medium format outfits buy a fourth one? Good question.

My answer is that I'd been feeling restricted by the lack of movements in my fixed plane camera bodies. Working with medium format often means that I'm working within a range of narrower depth of field's than someone using smaller systems.

I know for instance that with my Hasselblad 50mm or my Mamiya 7 50mm, the closest I can get to my foreground subject is about 1 metre. For those of you who don't know much about medium format, a 50mm lens is equivalent (I must stress - in angle of view only) to a 24mm lens in 35mm format. I still have the depth of field properties of a 50mm lens, because a 50mm lens is a 50mm lens, no matter what format of camera you bolt it onto.

Shorter focal-lengths provide more depth of field than longer focal lengths. And this is affected by the choice of format you decide to use. Use a small format such as Micro-Four-Thirds and your focal-lengths are half of what they are with 35mm. Consider the following table. If you were to aim to get the same angle of view as a 50mm lens in 35mm format across other camera formats, you would use the following focal lengths:

But bear in mind that you have a lot less depth of field at 150mm than you do with a 25mm lens for the same aperture. You can see how focal-lengths affect depth of field by playing with an ultra-wide lens and a 200mm lens. When you attempt to focus an ultra-wide lens, it kind of feels as if nothing much changes right? That's because even wide open, most of the scene is in focus. Whereas with a 200mm lens, you find that the focus has to be extremely precise.

Back to my choice of field camera. Most 35mm shooters using a 24mm lens can get as close as 2 feet to their foreground and keep infinity in focus. With my medium format systems - I can't. The closest I can get is 1 metre, and that's all because I'm using a focal length of 50mm to get the same angle of view as your 24mm lens. One way I can get round this problem is to use tilt (see picture below for front standard tilt):

The other reason I chose to get a field cameras has to do with converging lines. I've been finding many subjects I wish to shoot don't work if I have to point the camera up or down at them. For instance, those lovely red huts in Lofoten can only be photographed if I'm exactly parallel to them. If I point the camera up, my subject starts to lean back, if I tilt the camera down my subject starts to lean forward. See picture below for an example of how to look down but also keep vertical lines straight (not converging). Notice how the film plane is level - the camera has not been pointed up or down:

I think buying new gear should always be done with a lot of consideration. We often think about the benefits of what some new equipment may bring, but rarely do we think about the consequences it may have on our existing workflow. I'm always concerned that I may lose something I value in the process of changing something.

For example, I had been using nothing much else but a Mamiya 7 outfit for around 12 years with only 3 lenses. I am so used to visualising compositions in these three focal-lengths and also in a 6x7 aspect ratio. I think my compositions got better and better over the years because I was so tuned into using the same tools time and time again.  Around 2010, I took on a Hasselblad (which has a square aspect ratio) and when I did, I did it knowing it would take me at least a few years to settle into it (it did). I felt I might find that it changed the way I see compositions and I was concerned that I might find my compositional-abilities disrupted by the change. So I knew about the possible impact, and took on the change with a lot of care for my creativity.

And now that I've just bought an Ebony SW23 field camera, I've been very careful to buy the same focal-lengths as my Mamiya camera because I didn't want to affect the way I visualise. Changes to my process are always done in small, almost organic steps.

So now that I've re-entered the world of the view camera,  I've already told myself it will take time. A lot of time. And to be patient. I'm very self-aware of my creativity and I like to observe how things morph and change over time. That is one of the most beautiful things about photography for me.

Paul Wakefield Book Review & Exhibition

When I started out on my photographic journey, there were a few key photographers that I think helped point me in the right direction.

For instance, Galen Rowell gave me permission to follow my traveling-dreams, while Michael Kenna showed me that it was totally ok to create a 'new reality' through heavy manipulation in the dark room. But there is one photographer that showed me that nature and natural scenery often possess an abstract depth to them that can be utilised to create strong imagery. That photographer is Paul Wakefield.

Wakefield's compositions of well known places are often unique, showing that there is always an abstract shape or form to nature's design. I find his images of anonymous landscapes - the kind that many of us tend to overlook - just as powerful as his images of the iconic places we know so well.

Paul Wakefield's newly published book

For those of you who aren't familiar with Wakefield's work, he has been a terrific influence on many notable landscape photographers. I know for instance that Joe Cornish often cites Wakefield's images of Elgol on Skye to be the catalyst for him deciding to venture there in the first place.

A few months ago, I received news that Wakefield was due to release a monograph of his work to date. I bought my copy in a matter of seconds, because I so wished to experience his beautiful work in more detail than I can on a website. The edition I bought is the £175 collectors edition in a clam-shell case with a print signed by him. There is also a standard edition at £48 available from Beyond Words books here in the UK.

The book is beautifully presented and printed on very nice matt paper. It is a large book and is very much in the style of a classic Ansel Adams monograph. I think all landscape photography monographs should be printed with a timeless-air of design to them, and Paul's book fits this category unreservedly. It is perhaps my favourite landscape monograph since Michael Kenna's Huangshan book (which you can read about here).

On a side note, there are a few images in Wakefield's book that take me to places I know well: the Lofoten islands of Norway, Torres del Paine in Patagonia and the isles of Harris, Skye and Eigg. It seems that Paul has been more of an influence on my own journey this past decade than I had originally thought. What is so joyful for me then, is to experience a different perspective of these places - sometimes I found myself doubting if his images were of the places I know, because his compositions often offer an unexpected view.

It is his skill for assembling great compositions in such a way that I find the most enjoyable in his work. I remember asking him a few years back if he could confirm that one of his images was of Lago Sarmiento in Torres del Paine, to which he replied  "don't you think images become more powerful when you don't know where they are from?" I would certainly agree with this.

The book does indeed tell you where his beautiful images were shot, but it saves us from any interruption by  leaving the images untitled, to enjoy for what they are, rather than for where they are a study of. For those of us with an enquiring mind, the locations are listed at the back of the book. I find this design choice a welcome one, because it removes any possibility of distraction while enjoying the work - images should be enjoyed first and foremost and analysed later.

Paul-Wakefield-E-card

So I end this post with news that Paul Wakefield is holding an exhibition this month at the Redfern Gallery in London from the 8th to the 26th. The gallery currently has stock of his beautiful hard bound book. The standard edition is available on-line from Beyond Words books here in the UK.

Redfern Gallery, 20 Cork Street, London W1S 3HL T: 020 7734 1732/0578 / F: 020 7494 2908 www.redfern-gallery.com