Colour as a Unifying Theme

Over the years, as my own photographic 'style' has been changing, I've had the good fortune to be in a position where I spend a lot of time 'noticing' the changes. This is perhaps one of the benefits of being a photographic workshop leader. In order to convey a message, and illustrate things, I've had to look at my own work and get to know myself a bit better as a result.


I wrote a nice little e-book about 'self-awareness' a while back, because I think that in order to grow as an artist, we need to become more aware of how we react to our environment. we need to get to know our moods and responses, as this will allow us to understand ourselves better.

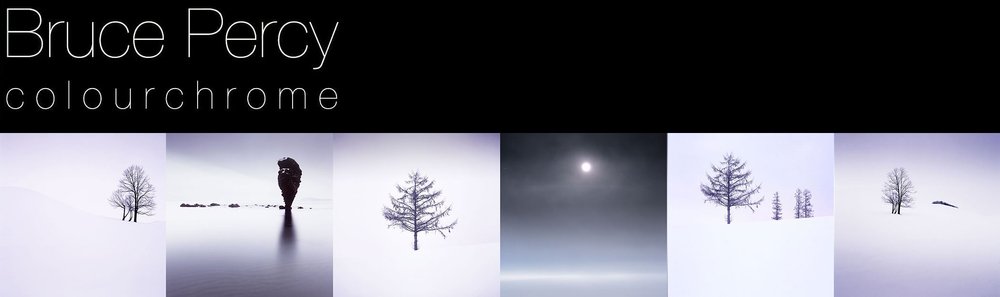
One aspect of making good photographs, that I think is seldom discussed, is that of using colour as a theme. We are often very absorbed by the idea of composition in terms of form only, that I believe we spend very little time considering how colour may affect our style. Or more importantly, how colour can be utilised as a theme to bring a body of work together - and make it stronger than the sum of its parts.

I've noticed in my own work, over the past couple of years, that the colour palette of a location figures largely in influencing what I choose to shoot. I think this all began in 2011 when I first visited the black volcanic beaches of Iceland. In venturing here, I discovered that I could shoot monochromatic scenes with colour film, but also, that the final work had more unity because the colours and tones present in the work were similar.


Certainly, being presented with the reduced monochromatic colour palette of black sand and white ice, should have spelled out for me the direction where the work might go. But I'm not so convinced that most of us observe colour in this way, during the making of images on location (back to my point about developing a sense of self-awareness).

My impressions of the trip just after getting home, was that it had been a complete failure. My head had been so full of the cold that I came home thinking I'd gotten nothing out of the trip. The epiphany happened once I got my films back from the lab. It was only upon viewing the processed transparencies that I saw unity in the reduced colour palette. I saw a way forward and I consciously decided to run with it.

I think there's an opportunity in every place we go to make photographs, to notice colour as a potential theme to the work. This is also true whilst editing the work afterwards. it should be possible to notice that perhaps a handful of the images go together more strongly than others - all because they have a similar colour 'feel' to them.

Utilising colour in this way, is now pretty much at the heart of my photography.

I tend to hone right in on those particular images that have a strong colour aesthetic. I will look through the entire shoot to see if I have others that fall in-line with this mood, or usually, it comes about naturally as I build up a body of work. Some of the images relate to each other more, because there is a strong colour relationship between them.

I will even, after collecting many completed images, distill them down to those that have a strong colour relationship, because it has become a 'signature' - a unifying theme to the whole portfolio.

I don't expect others to be as literal with colour as I am. But I do feel that being more aware of colour relationships as a unifying theme that goes right through a body of work is beneficial.

Composition of an image does not just end at where we place objects within the frame, object placement is only really one dimension. Colour adds an additional dimension.

Just like black and white photographers will often tone a collection of images so that they have a similar feel, colour photographers should consider utilising the same approach in their work. If it brings forward a direction in which one wishes to explore further, then that's a good thing.

Working on some new images

  Just a short post today. I'm entrenched in my home studio, busy working on a massive backlog of images from the Bolivian altiplano and the Chilean Atacama desert.


I thought it would be fun to share with you an image of my beautiful Gepe light-table. I love working with transparencies, and laying them out in a collection like this.

I can 'see' the portfolio coming together a little more clearly when I do this. I'll sometimes pick out the best images from my sheets of Velvia 50 to scan, before I go back and have a bit more of a detailed review of what else is there. It really depends on how i'm feeling. Other times, I'll work systematically through each sheet of film one at a time, until I've garnered all the good stuff. On average, there tends to be around 2 images a sheet (10 shots) that I like, and want to scan.

I  love how transparencies have the colours already 'programmed' into them. Velvia is a highly saturated film, so I tend to work the opposite way to most Raw shooters - rather than adding in the colour, I tend to scan and then decide which colours (if any) require desaturating.

If you click on the image above, you'll see a higher resolution one.

For those of you who have never shot film, or transparencies, you're missing out on one of the most satisfying parts of creating images: that of laying out your transparencies on a light table. There's something about the tactile aspect that I think lends some kind of emotional investment to the work.

As for viewing the images on the light-table, the colours just glow - this alone can provide ample inspiration for the editing stage, and I'll often find myself feeling very excited as a result.

From left to right: Salar de Uyuni, Sol de mañana geyser basin, Pescado Island, Sol de mañana geyser basin, Flamingos at Laguna Colorada, Atacama Chile, Little Italy stone desert Bolivia.

-8 EV Exposure Meter

I've been thinking of doing some night photography in Venice later this year. From what I hear from a few clients of mine who have either lived there or know the place well - it's almost impossible to shoot Venice during the day because of all the tourists. Night time is best. My trusty Sekonic 758DR light meter is hopeless at metering in the later stages of twilight.

Gossen Profisix

So this week I managed to find a Profisix SBC exposure meter on eBay. I've been looking for one (very casually) for a few years. I first saw one on my very first workshop in Scotland. A Danish client showed me it take a meter reading towards the edge of twilight and night. I was impressed to see his meter tell him an exposure reading of 15minutes. Reading up on the light meter, I found out that it reads down to -8 EV. That's quite an achievement considering that my Sekonic light meter only reads down to about -1 EV - if that. I often find my Sekonic fails to read anything at all once we get in to the later stages of twilight, when most digital cameras seem to be able to read into what feels like absolute darkness.

Of course, moving to a digital system for this kind of thing would be highly advantageous. If the exposure is wrong, we just check the histogram and apply exposure compensation in degrees of 1 stop increments. Think of it this way - adding some arbitrary number of seconds (say 10) onto a 60 second exposure makes very little difference (it's only a 1/6th increment). So it's best to apply method to your madness, and increase the exposure by a stop at a time (double the exposure time) until the histogram is showing you a better distribution of tones.

But I've been using film for around 25 years now. I don't intend to stop, because I love the look of the medium. I also love the surprise element of what I'm getting. There's a mystery to what is being captured on my film: with no preview screen, I have to 'preview' in my minds-eye. I've said for a very long time that I find this a very satisfying way to work: my imagination is given a bit of  a work out, and I feel this really has, over the years, helped me keep a strong sense of visualisation.

Now, I just need to go and book those flights to Venice.


Film Streaks Mystery

For the past five years, I've occasionally notice vertical banding in some of my Velvia films.

Please click on the image for better detail.

Here is what I have tried to do to eliminate the issue:

a) I've tried different labs for processing, and still get the same results.

This has led me to believe that it is either x-ray damage, film manufacturing damage, or the camera is at fault (possible light leaks or unevenness of film in the back of the camera), or filters in front of the lens?

b) I get the streaking problem with my Mamiya 7II camera, and also my Hasselblad, so I feel that rules out the actual camera body. Which baffles me, because it appears to be on the same area of the frame!

c) My lab has looked at the films and states that it's not x-ray, because it would also be evident on the dark parts of the film and it is usually a wavy streak going across the film anyway. So that rules out x-rays. I've never had any issue with x-rays ever. I've had some film in my bags over multiple trips and multiple x-rays and never seen any fogging or streaks like this.

d) This has led me to think it might be manufacturing issues with the batch of Velvia I have. I have looked at all my images since I returned from Cappadocia, and around 10% of them are damaged. I looked at my film stock and determined that I have a small batch of film left from around 3 years ago - when Fujifilm kindly sent me a lot.

I've decided to use the newest batch of Velvia I bought just before Christmas, for the next while to see if this eliminates the issue. But in the meantime, I would like to hear from you if you have had similar results with your films, particularly with Fuji Velvia.

So film is too expensive huh?

I'm sure this will fuel the fires of those that think nothing better discussing the merits of Digital vs Film.

Personally, I made my mind up a few years ago which medium works well for my style of photography. We pay our money, we make our choices and I respect anyone else's decision to go with whatever medium, be it digital or film.

But I'd like to talk about the false assumption that Film is expensive to shoot. I hear from a lot of people that they're interested in moving to film, but the cost of buying the stock and processing it is cost-prohibitive for them. Add in the fact that you need to buy a decent film scanner, and the speed at which you can turn around your images - and it rapidly becomes a no-no for most.

I think there are really two arguments to this. One is, I'm a bit worried about it costing me money and the other is 'I'm not committed enough to try film out'. Both are completely separate arguments.

I don't think film is expensive, if you consider that buying a new DSLR every two to three years is a reality for a lot of people. I think it comes down to the fact that people like buying cameras, like buying the latest equipment. This has nothing to do with creating art.

If you want to get into film, then buying a film camera at the moment couldn't be cheaper. Buying a decent film scanner will be a little harder as there are few to choose from and most keep good second hand prices on eBay. But I reckon if you stick with that cheap Medium Format outfit and a sub 1K film scanner for more than 3 years, you'll be just as cheap as buying a new DSLR, and you get the chance to try different film stocks with their respective look and feel properties. You may even find that you love shooting Medium format, Large Format, and wonder why you never made the jump in the first place. You may discover that this has opened up a new creative path for you.

On the other hand, you may be happy buying the latest digital SLR every couple of years - which is fine. Just consider that the argument about film being expensive is a moot point. If you really wanted to try film out, there'd be no stopping you.

Mamiya 7 - Good & Ugly

I get a lot of e-mails regarding the Mamiya 7 camera, which I use extensively for my travel and landscape shots. I feel that many people assume that having the same camera as me is going to make their images better, which I misleading. But for those that are intrigued by the camera and want to know what I think about it, I'm going to give you the low down here and now.

mamiya_7iibig

Q. Why did I choose this camera over other Medium Format systems?

A. Because first and foremost, I wanted something with maximum resolution and lightest weight. I do a lot of traveling and it's important that the camera is light and that the lenses are light too. Try out many other MF systems and you'll soon see why the Mamiya is great for compactness and light lenses.

Q. What is the resolution like?

A. It's a rangefinder system, so the lens designs were not compromised by having to 'work around' there being a mirror in the way. The wide angles in particular extend right into the camera body and are a few mm close up to the film plane. The distortion in these lenses is almost non existent. Point the camera down and the horizon is at the top of the frame - straight as an arrow. No barrel distortion.

Q. Are the lenses fast?

A. No. This is the real downside - depending on what you are shooting. With maximum apertures of f4.5, they are a few stops slower than other MF systems. This is because Mamiya couldn't guarantee precise focussing with a rangefinder MF system. For instance, a standard lens in MF land is 80mm or 90mm. Now think about the DOF (depth of field) you have on a 90mm lens in 35mm land.... it's not that deep is it? If your focussing is slightly off, chances are that at f2 you're going to notice it. So the best compromise is to make the lenses slower. So that's the downside. Slow lenses, but on the bright side, because they are slow lenses, they're not that bulky / heavy / big. A plus point. Ideal for travel.

Q. What is a Rangefinder anyway?

A. A rangefinder is a system where you do not look through the lens. You actually view through a side window an 'approximation' of what you will get. The problem with this is that focus is achieved by overlapping two paralax images onto the same spot... this requires some mechanical calibration so that when the images are overlapped correctly, the lens is actually in focus.

Q. So why use this system if it doesn't allow you to see through the lens then?

A. Because it makes the system more compact (no mirror in the way), you also get to see the scene at the point of exposure (no mirror flipping out of the way for a moment obscuring your view) and the system is also very, very quiet (no mirror to make a big slapping noise). The Mamiya 7 System has the shutters placed inside the lenses, making the shutter tiny - and therefore less prone to vibration. So images are often sharper than systems with large shutters that are 6x7 in size!

Q. What are the other limitations of the Mamiya 7?

A. Close focussing is terrible, due to limitations gaining accurate focus with a rangefinder system. No decent telephoto support either - the biggest telephoto you can get for it is a 210mm lens - at f8 !!!! and it's not even coupled to the rangefiner - so you have to guess the focus point.... bit of a silly lens unless you intend to use the camera for landscape work.

Q. So what do I like about the camera?

A. I keep coming back to the camera time and time again. I swear at it, curse it while I'm using it, feel I'm missing shots with it, but each time I get the films back and look at those sharp 6x7 transparencies on my light table... I instantly forgive it its weaknesses.

A. I also actually like composing the shot through the rangefinder window. Because it is an approximation of what is there, I have to 'visualise' more in my head what I am wanting to create - no bad thing.

A. I tend to use it in manual mode all the time for landscape work. I have a Sekonic L-608 light meter which I use for zone system metering, so I can determine where and if I should use a grad filter. So I tend to slow down with the camera and think more about composition.

A. I also love the 6x7 aspect ratio.

A. I also love how quiet the camera is when out shooting street scenes. Even though it's big, it doesn't attract as much attention as a small SLR does.

A. I also find placing the grads on the camera to be a non-issue. I compose, I check how much area the sky is using - if it's using a 1/3rd of the scene, then that's how far down I put the grad. Because the grad is so close to the front element, it's diffused anyway. I only use the hard grads. The soft grads are no use to MF or 35mm shooters because the lenses are small. For Large Format, the soft grads are worth holding onto.

A. I find the camera great for the landscape work I do. I have my process with this camera nailed down now, and am comfortable with it. I can take it anywhere with me and its been up the side of glaciers in Patagonia, on an ice field for a week (it uses small batteries), and its been completely soaked in New Zealand and it still worked the next day once all the water evaporated off all the lens elements.

Q. What don't I like about the camera?

A. No close focussing.

A. No decent telephoto support

A. Slow lenses

A. To change lens, I have to pull a curtain over the film via a dial underneath. Can't take any pictures until the curtain is released and I *always* forget to release it once I've changed lenses.

A. It's poorly made, bits keep falling of the camera.

But I keep coming back to it. But be warned : it's not for everyone.

Gaucho

As part of my romance with the Contax 645 system, I now have multiple film backs for it, which is a really nice way to go if you want to shoot different types of film. This is the nub for me. What I love about film is the different characteristics that each type produces. Velvia is supersaturated, unrealistic in colour providing vibrant landscapes, Portra has great skin tones and then of course there are a myraid of black and white films to choose from... each with their own look and feel.

gaucho, Torres del Paine, Chile 
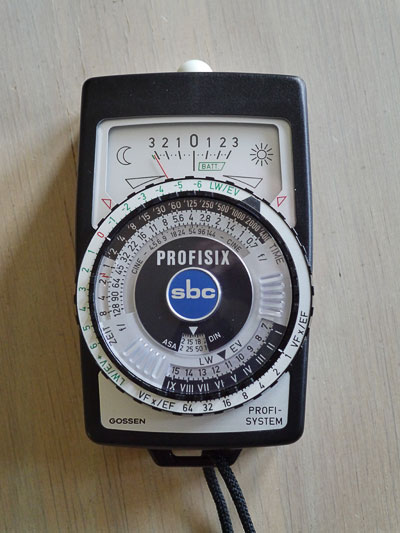
This was shot on Kodak Tri-X 400 and scanned on my Nikon 9000 ED film scanner with ICE turned off. What this means is that I had to go around spotting all the dust and dirt on the negative after scanning. It was a pleasure to do it. Perhaps I'm too old school.

While I was on my workshop in Torres del Paine national park, Chile, I like to take the participants along to see some real working Gauchos in the park. There are a few locations where it's possible to do this.

Anyway, I shot many images on Portra but also tried out Tri-X. You might argue that I could have shot this on colour film and then desaturated it in Photoshop to make it into a Black and White. You'd be correct, but desaturated colour films don't have the same grain properties that Tri-X has. For me, grain is part of the artistic look and feel of a picture. I've tried all those software emulators with digital, but have to say that it still looks digital. If you want the film look, go shoot some film.

Quality Control

I've just finished editing my images from the Bolivian altiplano and here is a contact sheet of the final 40 images I'm happy with. I was thinking today about how I love the entire creative process: you start with nothing and even trying to visualise what you may come home with is often nowhere close to what you end up with. There's that element of the unknown about the creative process that is intriguing.

contact

But there are some factors which can heavily influence the outcome of a body of work. I don't have a 'formula' as such and tend to like just 'going with the flow' and seeing where my editing will take me. But here is a rough outline of what happens for me:

1. I get home with a massive pile of films processed. I don't look at all of the sheets in one sitting because I'll be overloaded with the need to work on too many images.

2. I'm patient. Good work is not rushed and rome wasn't built in a day. So I just consider that each image takes time to be born correctly, and if there are golden nuggets in the pile of transparencies I have, then I will find them : at the right time, when I'm in the right mood to approach them correctly.

3. Sometimes I'm not sure how to approach an image, how to edit and this can be when I'm tired, done too much editing, or I'm simply not feeling inspired enough. Taking a break, heading outside for a walk, a cycle, or doing something else with my life completely seperated from my photography is the only way of approaching my images with a fresh and keen eye.

4. I work on a sheet at a time. I don't peek to see what else I have. I take each contact sheet on it's own merit and work on the best images from that sheet. This allows me to find images that I'd easily forget about if I found something better underneath.

5. I ruthlessly throw images away. For instance, on a contact sheet all the shots of the same location may be excellent, but there may be one or two that stand above the rest. Those are the two images I will work on. The others are stored away, but not used. If an image is not working, and I've tried a few things, given it some space, etc, then it will be discarded. If there is a glaring problem with focus for instance, then it is discarded. If the composition just isn't working, and no amount of cropping helps - then it's discarded. Sometimes I have a nice image, but something causes it to be discarded because it's simply too much effort to get it right. Good images should not take a long time to edit. They should just come together smoothly.

6. Quality Control. Ok, so I have say 40 rolls of film, each with 10 images on them - that's 400 images. I'll edit it down to around 80 images. Those that are really standing out mixed with those that are nice. Some may stay because I want to show an aspect of a location that is not already covered by the proposed final portfolio. But I will keep editing down, until I have a smaller number of images. If you want to be a good photographer, you have to be objective about your work and maintain a certain level of quality. Only release what you are truly happy with (unless you suffer from very high expectations in which case you are in trouble).

7. Be kind to your mistakes, try to see the images as someone else would. Some flaws are acceptible, and if the image still conveys a spirit or 'feeling' that you like, even though it's slightly blurred due to camera shake - then it's an image that still works. Images should be read on face value. Pixel peeping is not a productive activity. See the wood, not the trees.

8. Live with the images for a while. You get a sense of distance from the whole process and can then be more objective about your work.

I've taken around three weeks to produce 40 images. To some digital shooters, this is not a way forward, but for me : it IS the way forward. Good images, ones that I can live with and feel close too, can only be born correctly if I am receptive and nurtiring with what I do.

El Arbol de Piedra

On the Bolivian Altiplano, I photographed El Arbol de Piedra (the stone tree) around 6am. el-arbol-de-piedra

I had to retreat to the 4WD and sit in the warmth because my hands had gone so cold that they had become unresponsive. I couldn't operate my camera. It was a stunning revelation because I wasn't aware of it being cold. I'm not sure if this was because I was suffering slight altitude sickness problems anyway, but at the time I thought it was just that temperatures at higher altitudes just 'felt different' from the cold I know so well in a Scottish winter.

I dug out the contact sheet of film yesterday and this was the one that really stood out. It was shot a little bit earler than the rest and the light was just a bit more magical. Wish I'd laid off on the polariser though, but all the same, I'm happy with this shot.

Dali was apparently inspired by this very location and now that I've been there, I can exactly see how.

I shot this with a Mamiya 7 and I can't remember if it was wide angle (50mm) or standard (80mm). But I do remember not using a Grad filter because I found that the landscapes in Bolivia seemed to have the same luminance as the skies did. I don't know why that should be.

Just one of the many strange things I found different about shooting this landscape, compared to any other I've done so far.