Printing is a vital part of image Editing

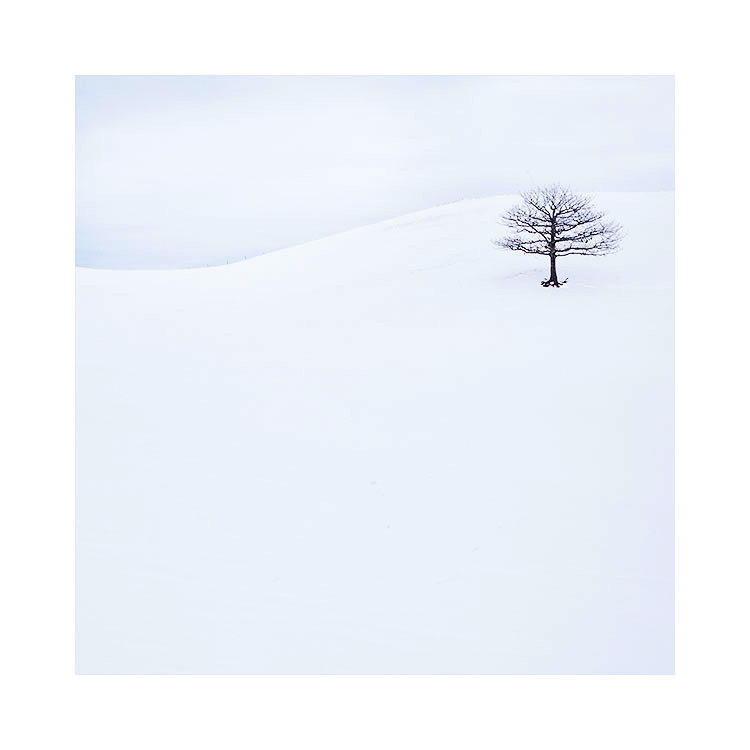
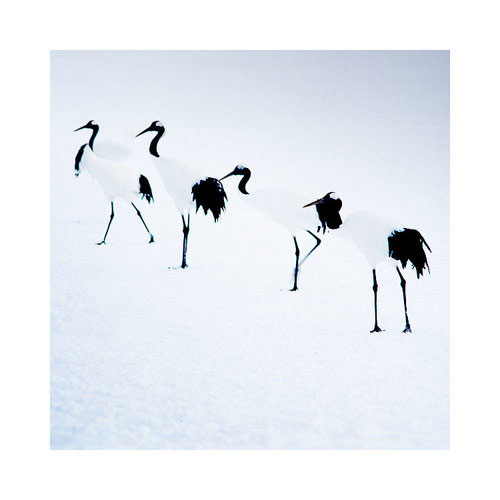
I've just completed the image selection and sequencing for my Altiplano book, which is due out later this year. 

As part of checking the images are ready for publication, I've printed them all out. There are a number of reasons why I've printed the images but it's mostly because no matter how calibrated my computer monitor is: no one should trust what they see on their computer screen. The only way to validate and prove that your images are as good as you think they are, is to print them out. 

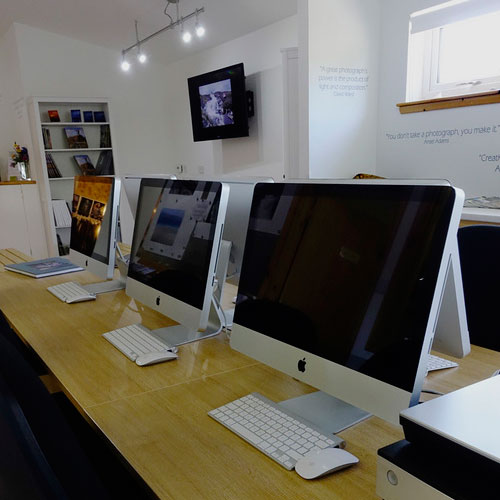
You should invest in a daylight viewing booth to verify your monitor is calibrated (by comparing a print target). And also to evaluate your prints.

There are a number of reasons why you should print out your images:

1. The human eye is highly adaptive. Stare at a computer screen for too long, and your eye adjusts to discrepancies in the white balance and also in the tonal range. 

2. I've often noticed things in the print that I never noticed on the monitor. Yet, when I go back to check if the problem exists on-screen, I now see it. See point 1.

3. Loss of highlights or blocked shadows become more obvious once printed. It takes a lot of time and skill to be able to 'read' a computer monitor and know what it's telling you. See point 1.

Mostly it's all about point 1.

I'm a big fan of Charlie Cramer, the American landscape photographer and once protege of Ansel Adams. I was fortunate to meet Charlie a year or so ago and listen to him talking about the value of printing and in particular how the human visual system works (and deceives us!).

The most memorable point that Charlie made is this (which I am paraphrasing):

"An image can look good on screen, but not good in print. But if you get it to look good in print, it will also look good on-screen"

I agree entirely. Printing *should* be part of your editing process. When you are dodging and burning areas of your picture in Lightroom or Photoshop, you should be printing it out to verify your edits. Editing and printing are therefore highly iterative. You should be circling around between them as you continue to edit your work.

Here is Charlie's talk from the On-Landscape conference I attended. There is a lot of wisdom in what he has to say so I would stay with the video to the very end:

If you want to create great images, then you need to optimise them. The only way to do that is to print them out and evaluate them with a daylight viewing booth. If you're not printing your images, you're not really finishing your work, and it most probably still has a long way to go to being complete.

The art of overlooking something

Sometimes I overlook images. I don't see them, don't recognise them for their beauty. It's a talent I have, one that I think most of us have to not truly see what is before us :-)

Pabellon.jpg

As part of reviewing work for my upcoming Altiplano book this year, I've been finding work that I can't quite understand why I passed it by. The images are very beautiful and yet I failed to embrace them at the time I was editing.

We all do it. Sometimes we don't see our work for what it truly is (this goes both ways - sometimes I think it's better than it actually is, other times I don't appreciate the beauty because I am so hung up on how I wanted the image to turn out, and don't accept it for what it offers.

There's a remedy to this: every once in a while, I go back to my older images and review them ( in my case - I look at the unscanned Velvia transparencies). I then focus on the work I didn't use and try to see if there's something there that I missed first time round.

I can guarantee I will find something for sure. Either because I was too focussed on other things to notice it, or I was simply too close.

One of photography's much needed skills, is the ability to review oneself. To do that, you have to be open to what you've done, accept the failures as much as the successes, and to be as objective as you can be.

No sitting on the fence

I've made some headway with my new e-book and I hope to have it published in a month or two from now.

This is really part 2 of of my tonal adjustment series.

Part one ' Tonal Relationships' was 'software agnostic'; I deliberately left out any 'how to' in the text and focussed more on the 'why' because image editing is an interpretive process where understanding tones and relationships is more important than figuring out which slider to adjust. Indeed the technical is something anyone can master, but the artistic interpretive side is a life-long artistic endeavour tied in with improving one's own visual awareness. Being able to 'see' what is in the image is paramount in achieving the most from your edits.

But there does need to be some kind of technical instruction if one wants to push things as far as they can. In my forthcoming new e-Book 'Photoshop Curves', I now take a look at the technical: in particular, I take you through the most powerful tonal editing tool available: Photoshop Curves.

Forthcoming e-book about Photoshop's Curves tool. The Curves tool is, in my view, the most powerful tool for tonal adjustment available.

Forthcoming e-book about Photoshop's Curves tool. The Curves tool is, in my view, the most powerful tool for tonal adjustment available.

I know this will be highly contentious to many: but it is my view that Lightroom does not offer the fine degree of tonal adjustment / control required (at the time of writing) that Photoshop's Curve tool offers.

Lightroom is a good editing tool. It is intuitive and offers most of what we need. At present though, the tonal adjustment side of it isn't as powerful as it could be. I know many love Lightroom and feel it is all they need for photo editing, but to me, it's a bit like saying 'I'm happy with what I know, even though there may something out there that can offer a whole lot more'. If you're serious about improving your photographic editing, and thus upping your photographic style, you need to get to grips with Photoshop and in particular its curves tool. That is where all your future growth as an editor lies. Believe me.

But I realise that Photoshop isn't an easy program to learn. It isn't intuitive and this may be a reason why you will choose not to learn Photoshop. However, this point shouldn't stop you if you are faced with the knowledge of what it can provide you with in terms of tonal adjustment. There is nothing better out there.

Over the past few years that I've been running my Digital Darkroom workshop, many participants who start the course as Lightroom users often end the course wishing to defect from Lightroom to Photoshop once they have seen what I can do with the curves tool. Even with seasoned Photoshop users I still find room for improvement in their knowledge of curves and how to utilise it to really tune individual tones.

So with this in mind, I have decided to write specifically about curves. It really is the most powerful tool available to image editors.

I appreciate and anticipate that my point of view will be highly contentious to many, but since my blog is all about my point of view, that's what I'm giving you, after all, you didn't come here to hear me sit on the fence, now did you?   ;-)

The three ingredients to composition

Composition is often thought about in terms of where to place the subject within the frame. But what if I throw the subject out of the frame, or at the most, give you a very limited set of subjects to work with? How would you compose your shots, and would you consider how each of them would fit together in a portfolio? What would be the unifying theme if you had to relate them in some way? Is it the subject, the location, or would it perhaps be the colour palette that would be a more useful way of uniting a set of images together?

Subjects are only one aspect of composition. Colour palettes and colour relationships are another, and lastly, there are also tonal responses. My own compositions are often sparse in terms of subject matter, so I think what unifies my work is either the colour palettes I play with, or the tonal responses.

In my latest Hokkaido work, I've deliberately gone for an almost black and 'light blue' tonal response to the work. The absolute blacks of the Crane birds match and unify with the dark tones of the trees of the Hokkaido landscape: this is one part of a two part ingredient list for making this portfolio work. The second part is the colour palette. Despite actually shooting a lot of 'pink sunrise' during my time on the island, I felt they were at odds with some of the stronger 'colder' colour palette images that I found lurking in my processed films. 

I've realised over the past few years just how important tonal responses within a collection of images is to unifying the set. Images are really made up of three dimensions: subject, colour and tone. For me, to think of composition as being about subject only, is to ignore colour and tone at your peril.

This is why I think my work in the Digital Darkroom is a vital ingredient to what I do. Clicking the shutter is only one small part of the image creation process. Identifying themes and relationships in my work is an important part of this process and is crucial in  bringing these themes tighter together.

New e-Book announcement


I'm pleased to announce that today I have released a new e-book - part 1 in a 2 part series:

In this e-book, I aim to give you some thoughts with regards to tone, and its use in photographs to strengthen and weaken relationships between areas in the frame. 

In essence you will learn that subjects may be related to one another through tonal similarities. By ‘tuning’ the tones of one subject to be more similar to the tones of another subject, you can introduce, or strengthen an existing relationship further. 

By using the principles discussed in this ebook selectively during your editing sessions, you can reduce tonal distractions, help emphasise the right areas of the frame and aid in balancing the overall feel of your images. 

The book is split into the following sections:

Section 1 - Tonal Relationship Examples

By giving you some real-world examples of how Bruce chose to edit his work, you will gain a clearer insight into the power of tonal relationships.

Section 2 - Tonal Evaluation Techniques

These Techniques will aid you in developing your own visual awareness of tonal relationship. They also help you in finding areas of conflict in the image and also of correcting / adjusting tonal properties to the right degree.

This one has been a while in the making and  It could only come about because of the work I've done holding my twice-yearly Digital Darkroom workshop. I hope you enjoy it. 

Part 2 isn't far away :-)

Do you desaturate outside of your comfort zone?

We also have our comfort zones when it comes to colour and contrasts. As a beginner I was always reaching for the high-contrast option, the deep blacks and bolder colours that I could get from my Velvia films and from the available light in the landscape.

But our world does not just have one face. It has many faces and many colours, tones, contrasts, and all of it is worthy of being utilised in our photography. I think moving into new regions, using softer tones and more subtle colour palettes takes time though. Again, like a child building a vocabulary of words, we too have to build up a vocabulary of light qualities and colour responses that we know will work in our imagery.

Desaturated (compare to the originals below).

Desaturated (compare to the originals below).

Our comfort zones often mean we have a tendency to push for the dramatic and bold. Not just in our photography, but in most things in life:

Q1. Does the bass and treble on the hi-fi system have to always be boosted?

Q2. Does the food always need to have salt and sugar added to it?

Q3. Do we always have to search out dramatic sunsets?

Q4. Do the Photoshop / Lightroom sliders always have to go up rather than down?

Can't there be enjoyment in the subtle as well as the dramatic? Do you even allow it in your work? Or are you always striving to make things shout out more to the viewer?

Going the other way leads you into new territory where there is another beauty, another enjoyment.

A1. Turning the Bass down on your hi-fi allows the mid-range to have more clarity.

A2. Cutting back on the sugar and salt in your food allows the natural flavours to surface.

A3. Shooting in more muted light brings you to new colour palettes, softer tones and new moods in your work.

A4. Moving the Photoshop / Lightroom Sliders to reduce things rather than boost them bring you to new colour palettes, softer tones and new moods in your work.

We often hang on to stronger tones and colour more through habit than an appreciation for them.

The originals before I desaturated them. We often hang on to stronger tones and colour. It's a habit, more than an appreciation for stronger colours and harder contrasts.

The originals before I desaturated them. We often hang on to stronger tones and colour. It's a habit, more than an appreciation for stronger colours and harder contrasts.

Where do your comfort zones currently sit? Are you often trying to push the dramatic aspect of your work or do you also play with the more subtle, softer aspects of our world? I ask this in all seriousness because photographs aren't just about great placement of objects to make good compositions. Good compositions aren't just about objects, but often about the interplay between colour, contrast and luminance.

We have so many comfort zones in what we do, and knowing where you are with that, indeed who you are, is key to growing as a photographer.

Short time critic

Now that I've completed work on my new collection of images - from the Puna de Atacama of Argentina, I feel it's an appropriate time to talk about being one's own critic.

Images from the Puna de Atacama. Shot in June 2015, and I didn't start to look at the transparencies until early October 2015. It is now early November, and I've had a few weeks to sit on them, periodically doing a review to see if anything needs to…

Images from the Puna de Atacama. Shot in June 2015, and I didn't start to look at the transparencies until early October 2015. It is now early November, and I've had a few weeks to sit on them, periodically doing a review to see if anything needs to be changed. But doing it for short spells, because this is the only way I can remain 'outside' of my own work.

I've mentioned many times before, that I prefer to leave a lot of time between the shoot and the editing. I deliberately hold off sending my films away for immediate processing, and if I were a digital shooter, I would deliberately hold off editing my images for several weeks (preferably more). This I firmly believe gives me distance because with time, I gain a realistic sense of objectivity about what it was I accomplished. Editing straight away I feel does not give me the chance to truly see what the images hold, because I am too close to the work: I tend to suffer from a prejudice, often holding onto ideals of what I hoped the images would be.

Giving some distance to my work allows me also to be a more honest critic of what I've done. In fact, I don't just give myself distance between the shooting and editing stages any more. I do the same thing during the editing as well.

Editing is an iterative process. For each image, I tend to go through a process of edit, then review a day later, do another fine tune edit and leave it for several days then review. If I do any further editing, it is short and then I save them again, and repeat.

The issue is this: in order to edit my work well, I have to be a critic of my own work and to do this, I need to remain objective. The nub of the problem is that I'm only able to be an objective critic for a short while, because the longer I spend on the work, the higher the risk is, that I will become too lost in it. So I tend to review for short spells only. (tip: take note of your first impressions as they are usually right).

Being a good critic of my own work has required me to be able to step 'outside of myself'. This can only happen if I take time off between the edit and review sessions and more importantly, am brief when I do review. I believe a good critic is a short-time one. Don't overwork your work.

Editing is an art, not a process

I think there is power in the written word. In fact, the decision to use one word or term over another can have profound implications for the way we think. I mention this, because for a long while now, I've really grown to dislike the term 'post-processing'. I'll explain why, but before I do, let's consider what the editing stage of a photograph actually involves.

From left to right: Left: Original Image © Dave BowmanMiddle: Dave Bowman's interpretationRight: Bruce Percy's interpretation

From left to right: 
Left: Original Image © Dave Bowman
Middle: Dave Bowman's interpretation
Right: Bruce Percy's interpretation

Firstly, I consider the editing stage as interpretive. Just as you chose which composition to shoot and therefore give the viewer a particular angle or story, so to does editing your image give you another level of conveying your story. Often I find that by darkening and brightening areas of the frame, I choose how the reader's eye should be led through the frame.

Secondly, I think of the editing stage very much as an art. I've been editing work now for more than 15 years and I still learn new ways to approach editing my work every week I work at it. So to me, not only is it an art, but as art forms go, it is a life long journey of discovery in visual awareness skills, interpretation skills and above all, developing one's own style.

So let's get down to why I dislike the phrase 'post-process'.

Dave Bowman's edit (higher resolution). Image © Dave Bowman

Dave Bowman's edit (higher resolution). Image © Dave Bowman

Firstly, it does not encourage one to think of this stage of creativity as anything but a process, rather than an art. As an extreme example of this, I've met one or two photographers who apply the same template or 'processing' to every image they have.

Secondly and perhaps most important to me, the word 'post' encourages us to separate the editing stage of our work from the image capture, and I have a real problem with that. You see, I often think that it's easy to consider image capture and editing as two very different things, when in fact they are highly related and often use the same skills: for example, when you crop in your editing application, you are re-composing, and when you compose out in the field you are in effect cropping the landscape. Similarly, when we edit our work, we consider how the tones and shapes in the frame interact with each other (if you’re not doing this, then you should be). The same should apply to when we are out in the field. I now find myself thinking more about shapes and tones while out in the field than I did years ago and I know this is because of what I've learned during my image editing time.

So although the first stage is done behind a camera and the second is done behind a computer screen, they both utilise the same awareness skills. Only problem is, I think many of us don’t see it that way and tend to approach each stage as if they are completely separate. They’re not.

Fieldwork to Digital Darkroom Workshop

This year I conducted my first Digital Darkroom workshop here in the north west of Scotland. I had specifically set this up to work on awareness skills while out in the field and while behind the computer. I made a point of saying that the course' purpose was not to teach the participants software programs such as Photoshop or Lightroom (although some techniques and tools are learned as a matter of getting to a result during the week), but more to help participants consider what is actually in the frame of the image and how to interpret it during image capture and editing stages and hopefully see the relationships between the two.

It was a very informative week for me, as this was a new area to teach in my workshop schedule. I feel I learned a lot, specifically when it came down to ‘how far does one go with the edit’. I feel there is no answer to this, other than ‘it’s a matter of taste’. Some participants I felt were far too light on their approach while others may have suffered from overworking the work. I often feel this is a balancing act that can only be corrected by leaving the work for a few days and looking at it again later. Distance gives objectivity, but with a lack of experience, we can still end up with images that either haven't gone far enough, or have gone too far.

One of my participants during the week is a very proficient photographer in his own right. Dave Bowman has been making images for over 30 years and is represented by galleries in the US, Canada and the UK. I found his skills as a photographer to be already highly developed. So much so, that I found it particularly hard to contribute anything to Dave’s work because he has such a developed sense of awareness and skill. But during an e-mail after the workshop, Dave said he might have learned a lot more about my approach if had edited one of his images from scratch, rather than contribute to what he had edited. I thought this was a great idea.

At the top of this post are three images. The first is the original image straight out of Dave’s camera. You can see that his sense of composition is well developed. The second image is Dave’s edit and the third and last image is my edit - done this week without any consultation or referencing Dave’s own edit.

Bruce's edit (higher resolution). Image © Dave Bowman

Bruce's edit (higher resolution). Image © Dave Bowman

There is never a definitive edit

Firstly, and even though I will say this, I’m sure it will be overlooked: this is not a test of which is better. That I feel, will always be highly subjective. But I include both edits here to show that ultimately, two photographers editing the same image can convey a different aesthetic / mood and style. Both images are successful in different ways and ultimately, both are highly personal interpretations.

When I spoke to Dave about my edit, he felt i'd move it along further than he would be comfortable with. Likewise, I felt his edit was far too subtle and that he hadn’t gone far enough. All this proves really, is that both Dave and I have different tastes and we are looking for different things.

I find that I always learn new things in looking at a different interpretation of the same work. And I also feel that being a good editor of one’s work is mostly about objectivity. If I am too close to it, then I find my ideas about the image are often out of sync with what is really there.

I’ve also found that if I try to edit the same picture from scratch on a different day, I always go somewhere new with it. Like a band that plays the same song, each rendition is different in some way and presents a different flavour. Which is why I think image interpretation is an art form. It's a life long journey into personal interpretation and self expression.


My first Digital Darkroom Workshop

I'm just home from leading my first ever "Fieldwork to Digital-Darkroom" workshop, which entails marrying what is done out in the field with the post-edit stage. My course is based on my e-book - 'The Digital Darkroom - Image Interpretation Techniques'

Still very much a work-in-progress e-book, but I feel I'm getting a better sense of what should be included now that I'm teaching digital-darkroom interpretation skills.

Still very much a work-in-progress e-book, but I feel I'm getting a better sense of what should be included now that I'm teaching digital-darkroom interpretation skills.

The course was run at Adrian Hollister's Open Studio environment in the north-west of Scotland. Adrian runs many workshops with such notables as Joe Cornish, David Ward, Eddie Euphramus and the wonderful Paul Wakefield. His studio has six iMac computers, all colour calibrated and it's on the door-step of some wonderful landscapes which are within a 30 minute drive. Perfect venue for running such a workshop.

I've been wanting to run a course like this for a very long time, because I feel that the editing stage is often considered as an almost secondary, isolated task, something that is unrelated to the capture stage. 

Adrian Hollister's Digital Darkroom Studio, Mellon Charles, Wester Ross, Scotland

Adrian Hollister's Digital Darkroom Studio, Mellon Charles, Wester Ross, Scotland

I firmly believe that the fieldwork and editing stages are interrelated. Our editing sessions teach us about things we didn't notice at the time of capture and they illustrate to us what we need to be more aware of in future - if we choose to make the connection! Similarly, once we know how far we can push and pull images in the digital-darkroom, we are in a more informed position whilst choosing certain subjects, contrasts and qualities of light. There is a symbiotic nature between the two, and so for me, the word 'post' as in 'post-process' discourages our thinking into believing both tasks are unrelated, when they are not.

In fact, I abhor the phrase 'post-process' because it makes the entire editing stage sound like a functional, emotionless act. Images become something you could just stick in a washing machine, turn a few dials and let it run on auto. Which isn't the case. Editing requires much awareness - of tonal relationships, of competing elements, of flow throughout the image.

And adjustments made in the digital-darkroom should be made whilst noticing how our emotional response is affected when we change tones and contrasts in the work. It is much to do about 'feel' as it is to do about technology.

So I made a point that this week's workshop would not be about teaching photoshop, or teaching Lightroom. Anyone can do that in their own time, and that kind of knowledge is easy to get. No, what I wanted to teach was how to interpret what you've captured - to see and take advantage of themes present within the composition, to notice tonal relationships between subjects within the frame, to see that each image has an underlying structure that almost spells out how it should be edited to bring these motifs further forward. 

The digital darkroom is a creative space, one where we can bring out the essence of the motifs we discover in the image. That's its primary function for me. I do not see this as a way for fixing bad images. A bad image is always a bad image. We have an expression here 'you can't polish a turd'. Instead, I see it as a way to bring out the beauty and essence that can, with a bit of interpretation, be found in a good image.

But interpretation is a skill, and like composition, has to be earned and improved over the lifespan of our involvement with photography. There is no manual for this, just an improved ability to read an image, to understand what is going on, and to know your toolkit (software) well enough to be able to bring forward your interpretation.

So I was curious to see how my group of participants would edit their work after five days of guidance and continuous feedback. I definitely saw improvements in most participants work. Certainly in the daily reviews I would notice that all of the participants had observations and awareness of what might be done to help remove distractions, or bring out themes within the work, but what I had not envisaged was that some of the group would be far too subtle with their edits and I think there are a few reasons for this.

Firstly, each one of us has our own aesthetic. We have our own tastes. Some photographers are more interested in the verbatim. What they see out in the landscape is what they want to capture, and so the edits will be done with a lot of sympathy for how they perceived their reality.

Secondly, some will under-edit because of a lack of objectivity. Ideally we need a few weeks between capture and edit. I always find that if trying to edit work straight away is hard because we're so often attached to an idea of what we wanted to convey and if the image is not successful in this regard, we may feel it is not a success. Leave it for a few weeks and you will come back to it with a fresh eye. If there are any motifs of themes within the image - you're more likely to work with those because you're more open to see other things where you were not at the point of capture.

Thirdly, I think under-editing happens through a lack of confidence. Too scared to adjust the image too much because the photographer feels they don't have enough skill to know what to do. But I also think it may be because they feel they may lose something in the process, and could be holding onto how the image looks now, and can't see beyond that to another destination.

It's this that interests me most and I must confess that I feel there is no clear answer. Editing is a skill that is derived from many years of self-improvement. If I look back at my own editing abilities, and consider images I shot 10 years ago, I can see that often I knew there was something missing in an image, but I couldn't put my finger on what it might be. I see tonal errors in them where at the time of edit, my abilities were so untuned I thought I saw beauty. Where I was perhaps overcome by the strong colours of my chosen film, I now see a clumsy edit.

Digital-darkroom skills take a lifetime of continuous self-improvement. We have to put the work in. But we also have to be smart about it. Simply cranking up contrasts or saturation across the board is a clumsy way to edit work, and it should be something that doesn't happen so much as it did when you began your editing career. But things only change if you take the time to consider and reflect on what might be the best way forward to edit your work, and self-awareness is something that has to be built upon over time.

I found my Digital-Darkroom workshop did help my participants. There were moments where I felt I had led my horses to water, only they were unable to drink, because if they can't see it themselves, then I can't force them to. Improving editing skills can't be rushed, but certainly a week in the field and behind a computer with a photographer you like the work of, may help bring about an improved sense of awareness, and that's what I believe happened this week.