Chronology

I’ve just spent some time over the past week curating the images on my website. To me, my website is like a garden of images. A space in which to let things grow over time.

I have just re-introduced a few portfolios that I couldn’t find space for. There are a few reasons why I take some of the portfolios off-line for a while, but mainly it is due to layout concerns:

1) I may have a portfolio that does not fit with the rest, maybe due to the tonal palette or subject matter.

2) I may have too many portfolios of the same region shot over many years, and in order to give the site some kind of clarity, will remove portfolios which I feel aren’t necessary to convey where my style is going.

3) I think my website is also a place where you can see the adaption or change in my style over time.

4) I am maybe unsatisfied with some of the work, so it gets shelved. Over the years, I have found it increasingly difficult to keep my older work on the site, because it feels too far removed from where I am now. Or I am now quite embarrassed by the work (which in my view is an indication of growth).

I thought it would be good to show the new sections of the site, and perhaps describe how I have chosen to lay them out.

Screenshot 2020-11-01 at 09.01.38.png

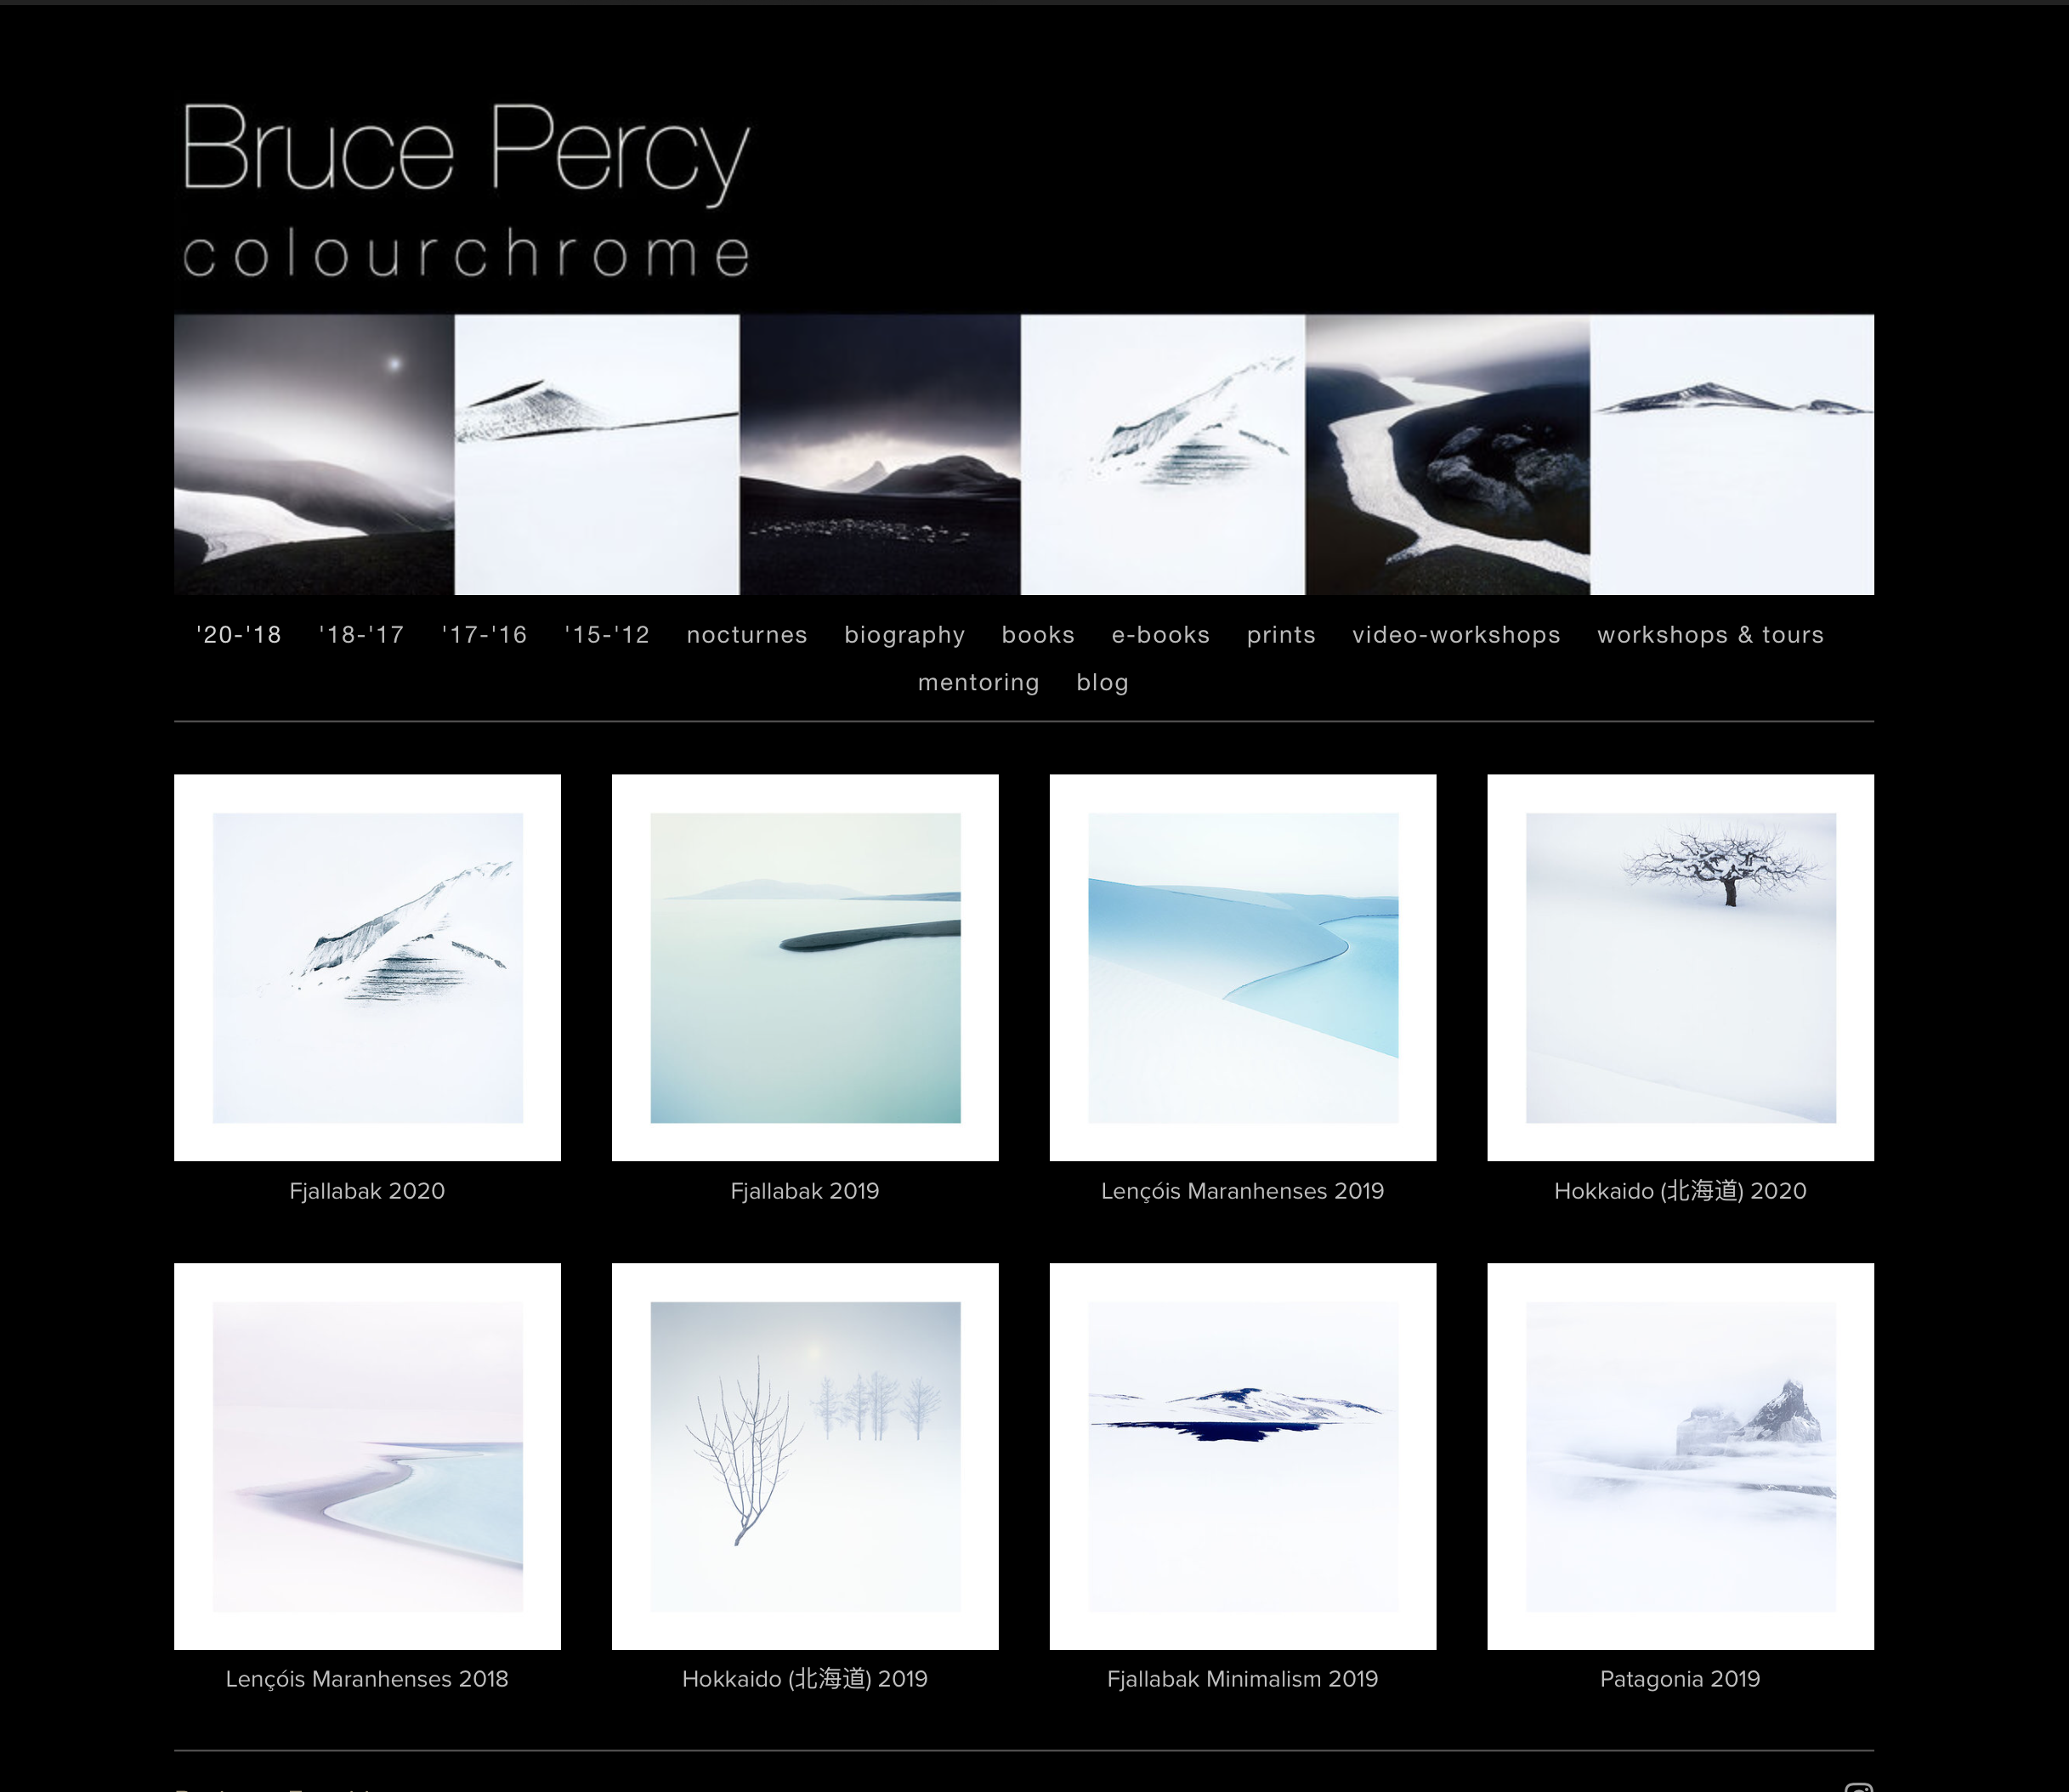
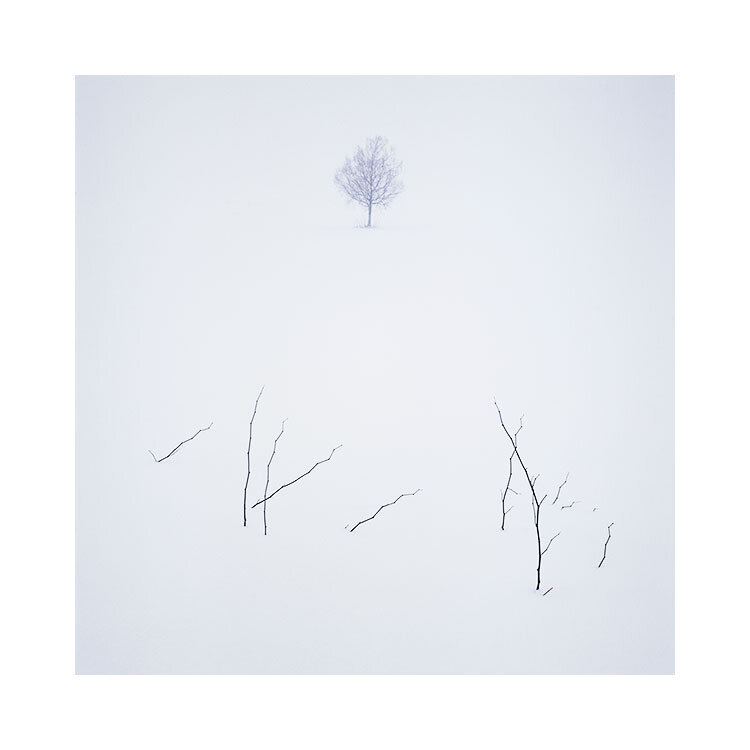
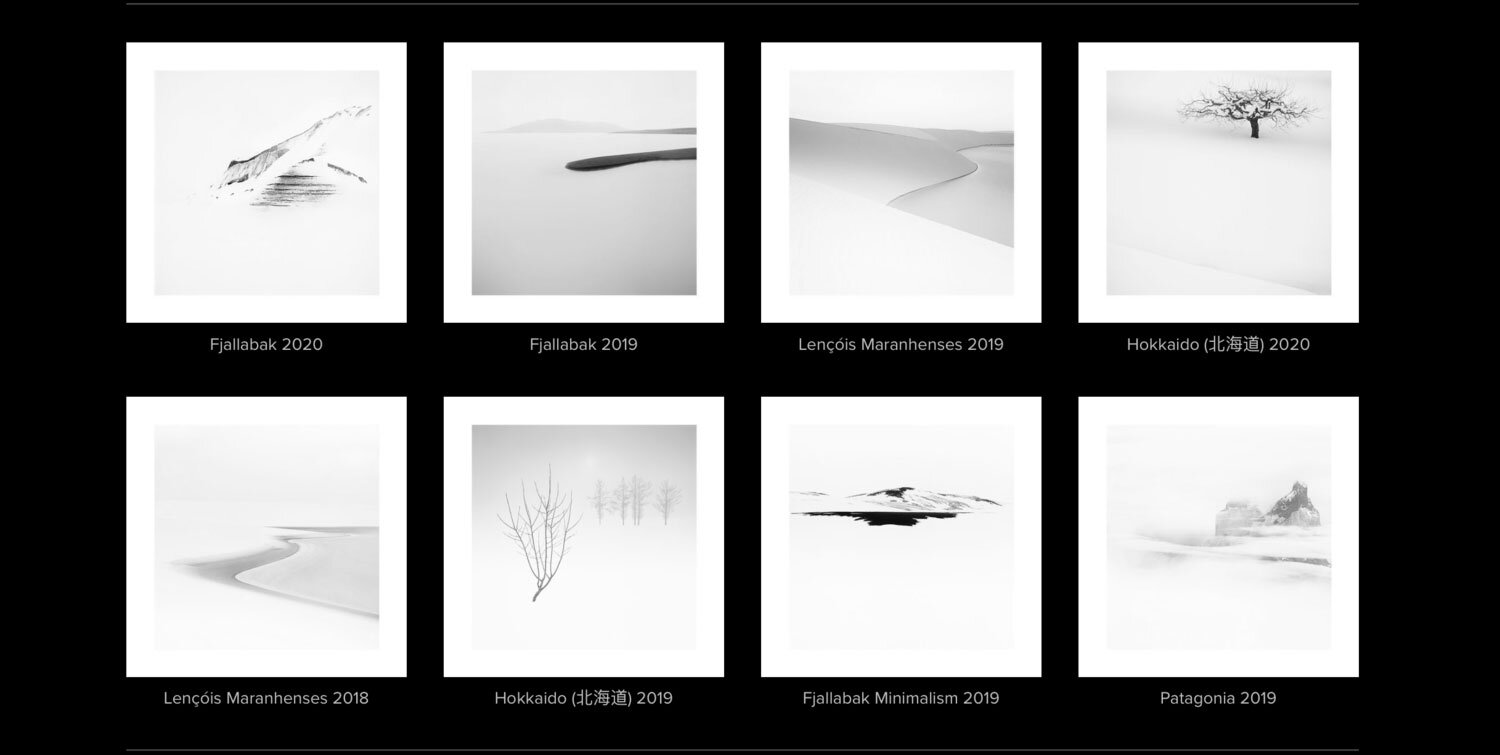
The page above is my most recent work. As a beginner photographer I am convinced I would have considered this work to have no colour whatsoever. But just for comparison, I show you the images below converted to black and white. You can now see that there is indeed colour in the work above. But I am sure for many they may perceive it as having none.

7.jpg

It’s interesting to find that looking at my older work from eight years ago and beyond, the colours feel too strong, too obvious and the older work speaks of trying too hard. It is my own view that muted colour comes from an understanding that you don’t need to shout to get your point across. I’d of course love to think that it comes from a place of maturity (hee hee hee), but I do wonder in all seriousness, that once you get past the need to impress others with your work, you settle into a place where you are comfortable doing what you do, and feel that you’ve figured out just how much contrast and colour is required to make your point.

I’d like to point out that none of this has been done with any premeditated intent. It’s just been an evolution of sorts and I’m never too clear as to whether this is just a case that my tastes have changed over the years, or whether it’s more a case that I’m seeing and noticing things more. I’d of course love to think it’s the latter ;-)

Screenshot 2020-11-01 at 09.01.26.png

In the page above, if I were to look at this in isolation, I’d maybe assume that my work hasn’t changed much since 2017. It’s only when I do a direct comparison with my more recent work that I can see that the more recent work is taking the colour reduction and subject reduction further. A fine-tuning perhaps? (I’d love to think so!)

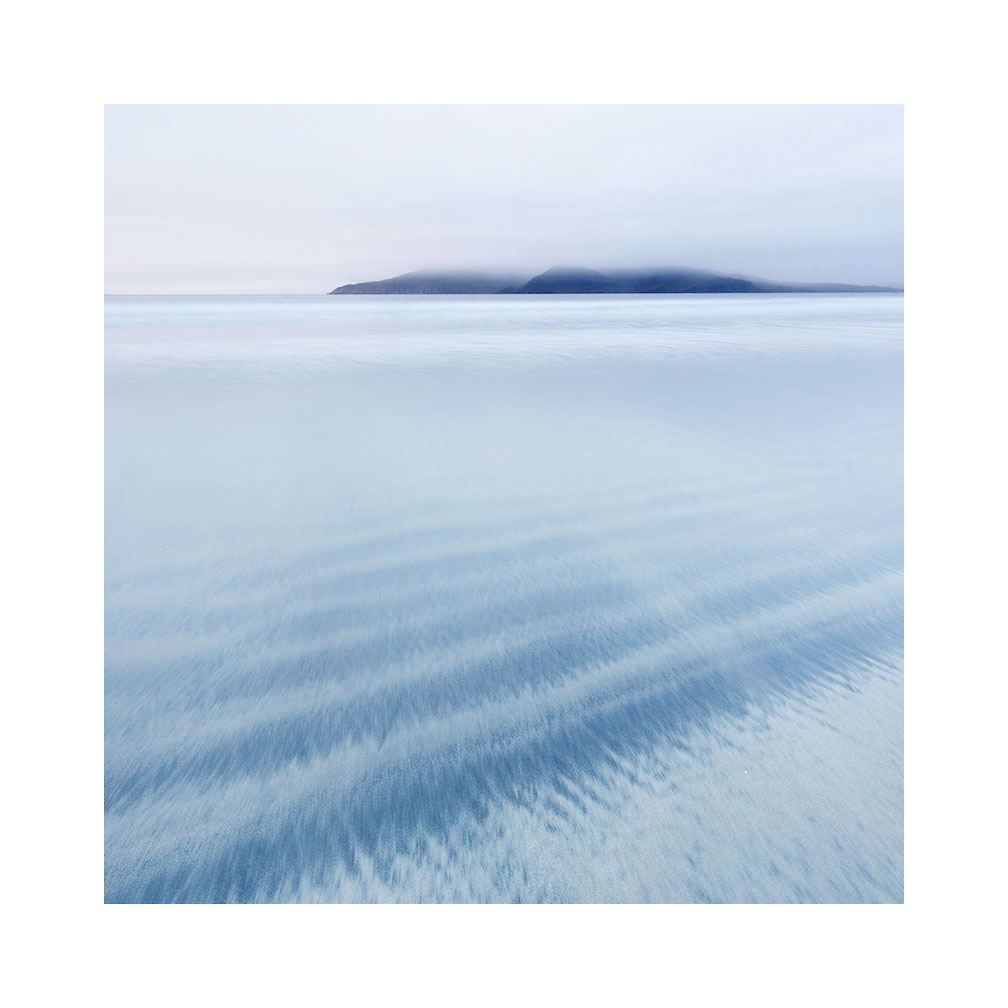
But you can see there’s still a bit more colour in this collection of image. I think the muting down of colour has been a learned experience for me. Going to the Fjallabak region of Iceland in winter time (bottom right), where there was almost no colour - I was shooting black and white scenes with colour film, I learned so much from this.

I have often said that certain landscapes, if you meet them at the right time in your own photographic development - can move your photography along in leaps and bounds. I am convinced that had I stayed in IT, and never been able to shoot so much, and go to so many of these winter places over the past 10 years, that my style maybe wouldn’t have moved on so much, if at all. I’m convinced that working in the Interior of Iceland, reducing things down to their utmost basic elements, gave me the permission to attempt to do the same with less empty landscapes.

I’m pleased to re-introduce my Romania, Harris and some of the more minimal Fjallabak portfolios. I’d almost forgotten about them :-) But now that I’ve re-introduced them on my site, I think there’s a more completed story of my own progress (for me at least).

Screenshot 2020-11-01 at 09.01.12.png

In the page above, you can see there’s a mix of more ‘traditional’ looking landscapes with the graphic elements that I like to play with. At the time of making these, I was thinking that I’d maybe gone as far as I could with simplification. Not that I was consciously trying to strive towards it. Everything I’ve done has been purely emotional, despite others thinking that I deconstruct landscapes. I don’t. I just shoot what appeals to me.

But looking at these, that cone shape in Argentina (top left), taught me so much about the graphic nature of composition. That sometimes shape, is all that’s needed to make a powerful image. I’d certainly say for me, there are a few epiphanies in this collection of work from 2016 to 2017. Working with the Fjallabak region of Iceland allowed me to start to subtract colour, to embrace blacks as negative space. I also find it telling that personally for me, the Altiplano shots here, are not my strongest. I feel that by this point, I had ‘mined’ as much as I could out of the Bolivian altiplano and this was at the tail-end of my work there. I knew my book about Altiplano was almost ready because I was starting to run out of ideas and to see new things in this landscape. I think this is perfectly natural and it either signals that your work in a region has come to an end, or your current level of style and ability can’t go much further in it at present. Perhaps if I return in 10 years time, I may find that I am able to see new things in a old friend?

Screenshot 2020-11-01 at 09.00.58.png

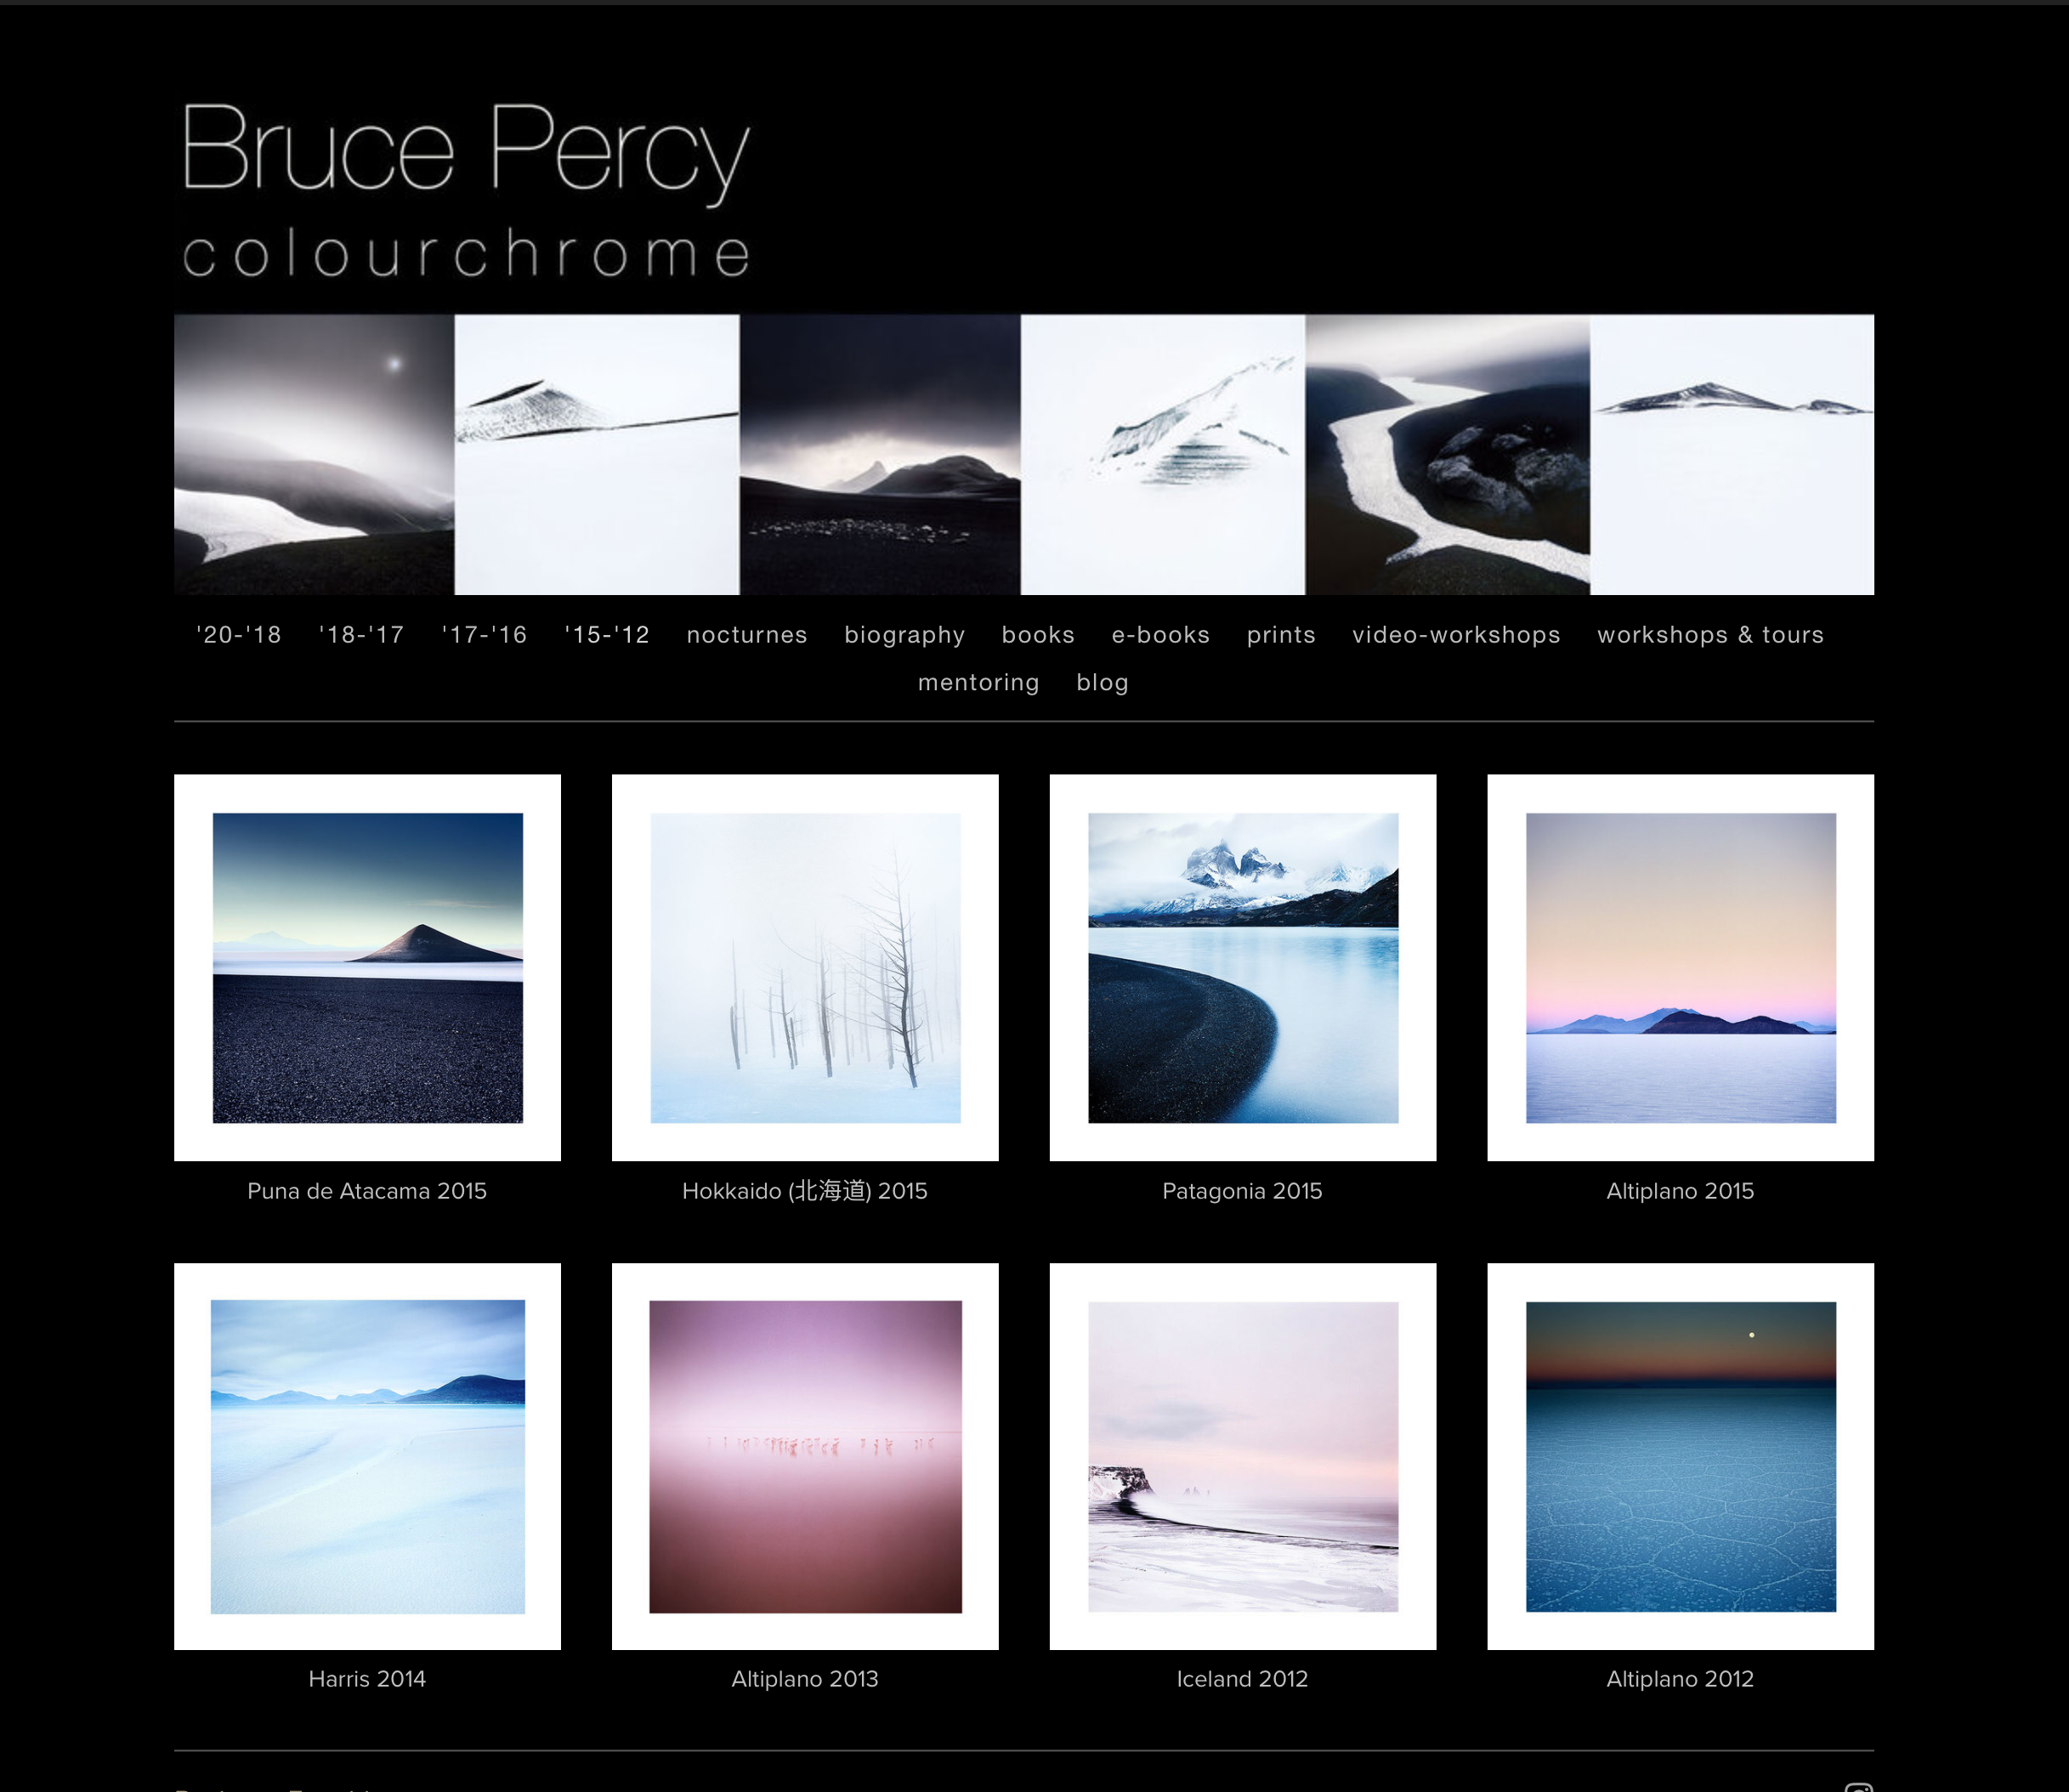
In the page above, I’ve been able to re-introduce some early work from Iceland’s coastline from 2012, and also some earlier work from the Bolivian altiplano from 2012 (last two portfolios).

By contrasting this page to my more recent work, it’s evident that I’ve been subconsciously on a colour-reduction quest, as well as tonal-distraction-reduction quest also. As I say, none of this was consciously any decision on my part. I just think my style has evolved.

What is interesting to me, is that these images are just on the periphery of what I feel is acceptable to show you. Older work from 2011 back to when I started out - does not work for me at all any more. I find the colours too gaudy and the contrasts too hard, and I feel that in my much older work there was a need to get my point across, perhaps too much.

I do feel that all the landscapes I’ve shot over the years have been great teachers. There are many places that I went to that never amounted to anything (Yosemite valley springs to mind) where I could do nothing with the subject matter, or where I found the location too hard, too difficult to work with (I still think Scotland is like that - there is just too much chaos in the landscape, too much tonal distractions for example). I tend to go back to landscapes that allow me to grow and I think I’m good at figuring out when a landscape allows me to do that.

I have often said that many photographers try to shoot landscapes that are too difficult for their current level of ability. It is much better to focus on the landscapes where you feel you are getting somewhere with. I am convinced that they are growing places for you. It is my view therefore that returning to a key number of places over the years, as I have done, allows for more intimate study and growth of one’s own style. The subject matter to a degree informs the style, and the style to a degree informs what you choose to shoot.

As I said at the beginning of this post today, I look at my website as a garden. I am often able to see where my style has evolved over time, and also how my images in certain landscapes have changed over the years.

Imperceptible Horizons

When you take the horizon away from a landscape photograph, the viewer is inclined to invent one.

Hokkaido-2019.jpg

We tend to imagine what we need to complete (to make sense of) what we see. This is true of photography, but it is also true of how we use our visual cortex in our daily activities.

Everything we see is a ‘construction’, and it’s so innate to us that we’re not even aware of it.

Consider the Necker cube. You immediately know it’s a wire frame cube. But what is interesting to me is that our ‘construction’ can be influenced. You can choose which walls of the cube become the back wall and the front wall. After a while you can flip them so what was the back wall is now the front wall, and what was the front wall is now the back wall. The necker cube is great at illustrating that your vision is a ‘construction’.

Necker cube. Can you imagine this cube in different ways?

Necker cube. Can you imagine this cube in different ways?

When we look at photographs, we ‘imagine’ the scene in our mind’s eye. We essentially construct it. And most interestingly to me, we tend to create any missing supporting elements we need to help us make sense of an image. This means that we may imagine things that aren’t actually there.

In the three photographs in this post today there are no horizons in the shot. Yet I think most viewers of these three photographs will ‘imagine’ a horizon. They will essentially imagine what isn’t there to help them complete (or make sense of) the image.

There are many ways in which we tend to ‘imagine’ what isn’t there. For example:

  1. What is outside of the frame. We tend to ‘continue’ the photograph outside of the frame. In our mind’s eye we tend to imagine beyond the perimeters of the frame.

  2. Objects at the end of the frame tend to continue outside of the frame. If a mountain begins to slop up and out of the frame, we tend to imagine the rising angle continuing outside of the frame.

  3. If there is no real horizon, we either tend to invent one in our mind’s eye, or if there is something within the photograph that can act as a substitute, we will use that. This is what false horizons are.

Knowing about this ‘feature’ of the visual cortex to ‘fill in the gaps’ can be a great photographic tool.

Indeed, in the case of point 1. above, (we imagine what is outside of the frame). I tend to use this a lot to help viewers imagine that the landscape is very empty. If there is nothing around the perimeter of the frame then one tends to imagine that everything outside of the frame is a continuation of that ‘nothingness’.

So in today’s post, I’ve selected three of my images where there isn’t a clear horizon. You can ‘imagine’ where the horizon is, even though in some of the images there really isn’t a horizon. No really, there really is absolutely no horizon in one of the images in this set. Do you know which one?

Imperceptable horizon, Lençois Maranhenses. The horizon does exist. Except that I’ve chosen to edit it to make it ‘almost’ invisible.

Imperceptable horizon, Lençois Maranhenses. The horizon does exist. Except that I’ve chosen to edit it to make it ‘almost’ invisible.

In the above image, perhaps, depending on your monitor, the horizon is perceptible. It is there, but it’s so faint that it’s almost become invisible.

Deliberately making things imperceptible

Indeed, this was my intention during the edit of this photo.

My aim was to reduce or simplify the image down to one subject : the graphic nature / shape of the lagoon edge. Remove the horizon line and the lagoon edge starts to float. It becomes the sole reason for looking at the photo.

And yet I know that most viewers will ‘construct’ or ‘invent’ a horizon if one isn’t present.

I’ve had to think about why I love making the horizon disappear in some of my photographs. I think there are several answers to this:

  1. Pictures become more ‘mystical’, or ‘dreamy’ when things aren’t so obvious.

  2. The mind has to work harder at figuring out what’s going on.

  3. It reduces down and simplifies the image so it’s easy to ‘digest’.

  4. The mind tends to fill in the gaps where there is missing crucial information. The viewer is forced into their own ‘dream state’ by imagining what isn’t there.

Hokkaido-(16).jpg

Which image really has no horizon?

As I promised you at the beginning of this post, here is the photograph that has no horizon. It was shot on a sloping field where the background behind the tree is actually the field rising up above the top of the frame. So I know from being there that the sky was never in the photograph.

Yet isn’t it interesting that we can’t help but imagine there’s a horizon in there!

I love playing with images where things are left open to interpretation. In my view, why should everything in an image be crystal clear? Why indeed do we need high-resolution all the time? And why do many of us strive to make everything so obvious to the viewer?

Well, my take on this is that for most of us, there’s an insecurity in worrying that the viewer may not see what we saw, feel what we felt. So we either tend to over-emphasise it (and almost everything else) in the edit to try to spell it out. And this can at best make the image too conventional, or at worst ruin it completely.

Final thoughts

I think it’s completely fine to leave things unanswered, to allow things to be inconclusive for the viewer. If it helps create an imaginary world of sorts for your viewer to disappear into, then it’s a feature rather than a problem.

This is why I love imperceptible horizons, because I know that often it’s best to leave as much of the interpretation to the viewer. It promotes engagement.

Simple in design: the art of reduction

My good friend and client Stacey Williams made this shot on our Eigg workshop last week. I think it's highly atmospheric, effectively simple in composition and tonally very finely balanced. It tells me all I need to know without trying to spell it out either: there are no loud colours or over the top contrasts here, just an inner confidence to show you the beauty of one of Scotland's most photogenic beaches.

Bay of Laig, Isle of Eigg, Scotland.Image © Stacey Williams 2016, post-edit Bruce Percy

Bay of Laig, Isle of Eigg, Scotland.
Image © Stacey Williams 2016, post-edit Bruce Percy

And yet, to pull of a very simple composition like this is not easy for many of us. We struggle with the reduction that's required to distill a scene into one simple message.

I have a theory why this is.

For a long while, I've realised that when most of us start off making pictures, we tend to over complicate them. The final image often has a lot going on and within this complexity is the added dimension of tonal / colour conflicts. Photography is one of the few past-times where we start complex and spend a life-time aiming to make our photographs more effective by simplifying what we put into the frame (or perhaps more importantly, what we choose to leave out).

The reason why we start with overly-complex pictures is because we haven't learned to truly 'see'. Photography is a life-long discipline on being able to really see what is before us and translate that into an effective photograph and if we aren't really aware of tonal conflicts, or distracting objects in the frame, we will tend to leave them in. This is why we can often find our final image doesn't look the way we thought it would. We tend to 'see' differently at the time of capture than the way we 'see' when we look at an image on our computer screen later on.

I've been asking myself for a long while: why this is so? And the only thing I can come up with, is that we tend to look at scenery differently than we do when we look at images. The art behind many successful images is to be able to see the photograph within the scenery while we are on location. Many of us don't do this because we are overwhelmed by the elements of being there, and we still can't abstract a 3D location down into a 2D image.

But composition isn't just about where to place objects within the frame, and choosing what to leave outside of the frame. It is also about understanding the relationships between colours and tones within the scene. In fact, both are interrelated. 

Again, if you aren't able to truly 'see' the relationship between colours and tones within the frame, then the final image may be fraught with overcomplexity. 'I never saw that red telephone box in the corner of the frame', or 'the stone in the foreground is really dark and I can't recover it in post, I wish I'd noticed how dark it was at the time of capture'. This is a typical response because at the time of capture we were too busy thinking about stones rather than the tone or dynamic range of them and whether they would render enough detail in the final picture.

Visual awareness of what is really in front of us, is really at the heart of all of our photographic efforts. If we can't see the tonal distractions or see the conflicting colours at the time of capture, then it means a lot of massaging and coaxing in the edit phase, which isn't a great idea. In sound recording the idea of 'fixing it in the final mix' was always a bad approach and it's better to be aware of the problem at the time of capture and do something about it. If the colours are conflicting, then look for an alternative composition, if the stone is too black to render and will come out as a dark blob in your photo, then maybe go find a rock that is lighter in tone and will render much more easily.

Back to Stacey's picture. She chose a very empty part of the beach. She also chose some very simple foreground sand patterns that she knew were strong enough tonally, to attract interest. She also gave the background island a lot of space. The edit was very simple: we added a lot of contrast to the island to make it the dominant object in the frame, but we did it while doing almost nothing else to the picture because the picture was already working.

If you are struggling with composition, my advice would be to seek out simple empty places and work with one or two subjects within the frame. Add a rock into the picture and experiment with placing it at different areas. Also try rocks of different tonal responses. How would a jet-black rock look in this scene? Will it stand out from the background sand tones? How about a rock that is similar in tone to the beach? Will it stand out just as effectively?

The problem is, that what our eye thinks is pleasing, is often overly complex for our imagery. Good composition is not simply just the act of reducing down the subjects within the frame, but also of understanding which ones will work best tonally as well. Our eye loves more complex objects around us but they don't work when they are all crammed into one picture.

Good landscape composition is not something we master in a matter of weeks or months. It is a life-long journey in building up one's own visual awareness, of noticing what will work, and just as importantly what won't. If you're in it for the long haul, and you have a curious mind, then that's a very good start indeed.


Using tones outside of your comfort zone

When we edit our work, I think it's very easy to sit within a confined range of known and often used tones. We have what I would describe as a tone comfort-zone, one which we have settled into and tend to apply to most of our work.

Part of this is due to visual awareness issues, of not really thinking about luminance in the first place. We think of our images more in terms of scenery - mountains, rivers, grass, rocks, whatever. But we haven't passed this early stage and moved on to thinking about these subjects less as what they are, but what they provide in terms of luminance and other tonal qualities.

Indeed, our edits can be rather narrow in their tonal range, just like our vocabulary is narrow when we first learn to speak. We have to move outside of our comfort zone at some point, but this can be difficult if we're not really aware of what's out there and how luminance levels in the far brighter and darker regions of our images may serve us.

One technique I use is to push the luminance to extremes and then reign it back until I think it looks good. It's well known that if you move something to where you think it should be and compare that to where you would have ended up if you pushed it well beyond where you think it should be and move it back, your initial judgement will have been conservative. In other words, by really going over the score and then moving it back to where you think it should be, you'll find you've pushed the boundaries in your edits.

We all have our visual comfort zones and it's good to try to move beyond them. The only way to do that is to exercise your visual awareness by placing yourself at the extremes well outside the normal parameters that you reside, and see how the new terrain fits.

Our visual sense needs to be exercised for us to learn to truly see what is possible, and this is one such way to do it.

Small adjustments go a long way

For me, improving my photography is really all about improving my visual awareness. 

The original image unaltered.

The original image unaltered.

So in today's post, I thought it would be good to try and discuss how the tiny details can often make a huge improvement to the overall composition. The way I'm going to do this, is by cloning a tiny part of the above image out. Now before I continue, I wish to make it very clear that this post is not about 'here's how to clean up your images using cloning'. Instead, the point I wish to make is that by 'noticing small distractions at the time of capture you can strengthen your compositions'. The most effective way to illustrate how the above image may have been improved is by using cloning. But it's not a tool I would encourage you to use, except for maybe seeing where things could have been more tidy.

A side note: I would suggest that if you are using cloning to clean up your images a lot, then it might be an idea to ask yourself why you aren't seeing the problems in the first place. Failures are really an opportunity to see areas of our photography that require further improvement. If your visual awareness isn't good, then it will show in the tiny distractions you will see in your final images and if you spend time fixing the issue at source, you'll find you won't have to continually cover up the cracks later on. This is feel is at the core of our photography skill - being able to notice distractions (even small ones) at the point of capture, because they can help us strengthen our compositions by a large margin.

With this in mind, I'm going to show how much stronger the image would have been if certain distractions had not been present. I'm going to do this by cloning an area of the scene out. I use this technique in my workshops as a way to help improve participants visualisation technique - so they can understand that if these small distractions in the frame hadn't been present - the image may have been much stronger. Again, I'm not saying 'here's how to clean up your images using cloning'. Instead, I'm really saying 'let's look at how the image may have been stronger if we'd taken care of some of the distractions'.

Below is the altered image. I've chosen not to tell you what I've changed, because I think it would be really useful for you to look and try to find it. Suffice to say that if you do notice it, ask yourself why I maybe chose to remove that particular area and also ask yourself 'which photo feels the calmest?'. My belief is that when something is wrong or jarring in a photograph, we tend to feel it. And feeling things in your photography is key. Your gut should lead you in the right direction not only with how you choose to balance a composition whilst out in the field, but also in your choice of edits. Photography is an emotional art.

In this version, I've removed something from the image to 'simplify' the composition and hopefully make it stronger.

In this version, I've removed something from the image to 'simplify' the composition and hopefully make it stronger.

Personally I feel this edit is simpler, more elegant and I think the message is clearer. But you may be asking 'that's all fine Bruce, but how could I have removed the part of the scene while I was there, rather than use a cloning tool later on?'. My answer would be that you have to weigh up the errors you see at the time of capture and whether you can do anything to remove them whilst there. Perhaps if I'd repositioned the camera, the distraction may have been hidden by other branches? I do remember thinking there was no way around it - whatever I did - the distraction was still there. So I feel a sense of pragmatism was employed: I asked myself - can I live with it? Or does it kill the image?. In the case of this photograph, I felt I could still live with the distraction and you'll even see that if you go into the respective image gallery on this very website, the unaltered version is there. Because I felt that there was more working in this image than not.

So in general, here is my thought processes about distractions:

1) Can I reposition to remove it? And will it upset the balance of the composition if I do?

2) If I can't reposition without upsetting the balance of the composition, can I leave it in without it killing the image?

3) If the distraction is going to kill the image, then I would prefer to walk away and find something else to work with. Otherwise, I'm happy to leave it in.

4) Don't over-edit your work. It's fine to leave tiny errors in the picture if you feel the entire image still works. You can over-do cleaning things up so it's always a balancing game. Too much editing will leave the image looking very contrived. Too little and the image isn't fully realised.

So how does anyone go about improving their visual awareness? 

One way I would suggest, is to look at your work on your computer and ask what might have been improved if it wasn't present in the photograph. You can even go as far as cloning distractions out to see if the image would have been improved - but just to see if any improvement would have been made only - I'm not advocating you start to clone things out all over the place - that's not the point of the exercise - you're just doing it to exercise your visual muscle.

The simple act of imagining how an image may have been with something removed is a great visual technique to exercise regularly. If you do this while editing your work, it will become second nature while out in the field.

Visual awareness is all about asking yourself questions - by having a sense of inquisitiveness - at all times about what you're doing.  Rather than accepting a photograph doesn't work and discarding it, you can learn a lot about what went wrong by looking at the errors and asking yourself 'why doesn't this work?, what would have happened if I'd managed to get rid of the error?'.

I think that good imagery comes from going that extra 5%. if you can improve a good image by that 5%, it can be transformed into a very fine image indeed. It's up to you to notice and work with distractions whilst you are out in the field and that will only happen once you start to ask yourself questions all the time.


Making Things more difficult than need be?

I remember Daniel Lanois, the Canadian record producer and artist was once asked 'how do you record a good guitar sound'? to which he replied, 'first find a guitar that sounds good'.

As I've progressed with my own compositions, I've noticed that I tend to be very selective about the places I shoot. I don't choose them because of how famous they are, but instead, I choose them because of how simple they are, and how little work they require make an effective composition.

So in today's post, I thought I would show you an example of that.

Myself in the landscape, Hokkaido, December 2015

Myself in the landscape, Hokkaido, December 2015

Last December I spent a week on the Japanese island of Hokkaido. The above image is included in this post to illustrate that the location I shot, was pretty simple to start with. This is my 'selectivity' at play - I choose certain locations because I know there will be little resistance or errors in the landscape that I will have to wrestle with later on. Like Daniel Lanois' statement about finding a good guitar sound to record, I too believe that finding a location where there is little in the way to correct is much better, than trying to make a difficult location work better once I'm behind my computer editing.

Below is the final image I made of this location:

Despite the simplicity of the location, I still felt there were many many options available to me at the time of capture.

Where one might feel that all I had to work with was a group of trees and a snowy hill, I felt I had to be very careful with the placement of all the objects in the frame. Despite this location being quite easy to make a decent image of, I think the real skill in photography is to try to improve upon 'decent' and look for that extra special something that will hopefully transform my images from 'decent' to 'great'.

For instance, I was aware of the background hedges that I had to try and reduce in the composition. I felt that including the hedgerow at the back of the image (that is clearly seen in the first image in this post) would have been too distracting to the main subject (the trees in the foreground). 

I also had to make sure that the foreground tree's branches didn't collide with the hillside (as subtle as the hillside is - If the branches had touched it - I think the image would have been reduced back down to 'decen't rather than something hopefully better than that). You can see in the first image to this post that my tripod is lying completely flat on the ground - that's because I realised I had to get the camera down low to avoid the branches touching the edge of the hillside.

My definition of a great location, is somewhere that I don't have to wrestle with the subject matter too much to make things work. I've been to many beautiful places that don't work as a photograph and I've learned that 'great scenery does not equal great photography'. In many beautiful places I may find distractions that I can't avoid. For example, If I had found that no matter where I placed my tripod, the branches always touched the edge of the hill side, I would have made a decision at the point of capture as to whether this would kill the image or not.

So ultimately, what I'm really saying is that with a location where everything is simple, you shouldn't have to work so hard to make it 'click'.

Keeping things simple is the best advice I've ever had. It applies to how I make all my decisions in life, and it should also be applied to your choice of location that you are hoping to photograph.

Of course, the real skill is to see distractions in the landscape and to know whether they can be lived with or have to be removed. That only comes with time and us working on our own awareness skills.

Landscape photography I feel, is often the art of subtraction. Of being able to isolate one tiny part of the landscape and make a strong photograph from it. But this can be achieved much more easily, if we work with very simple locations to begin with, and not the other way round, as is often the case for many of us.

Watching and waiting and watching some more

When you're making photos out in the landscape, do you stop for a moment, and watch? In particular, do you pay particular attention to the speed of moving clouds? I do.

Sometimes participants on workshops ask me 'how long should I make the exposure for?' when they want to get blur in their photos. I think the answer can be found without asking me. You just need to look at the clouds and watch them as they drift across the sky, and while you're doing that, count the seconds it takes for them to move. It's really as simple as that. Only a lot of us aren't looking. We're not watching. We just fire the camera and wait to see what pops up on the screen.

But I love to anticipate. To study. To get to know the movement of clouds, waves, even the vibration of the trees due to a light wind. I'm a studier of movement in the landscape.

Particularly where long exposures are concerned. If it's a windy day, then I'm all excited as I know 20 or 30 seconds is an eternity and I'll get long streaks like the ones you see in my Harris photo above. If it's a calm day, then I know there's almost little to no movement and most probably - no point in using a long exposure.

But I still stand and watch, and wait, and watch some more. Just to make sure.

Do you filter down (reduce), or build up (introduce) objects into your compositions?

I'm always intrigued by the journey from the moment I step out with my camera and come up with the final image. It's a filtering down process for many, but for me it's the opposite way around. Let me explain.

Many workshop participants tell me that when they are confronted with some new location, they find it hard to filter it down to one or two main subjects. I remember one participant telling me that they 'start with everything and have to reduce it down to one or two things over a matter of an hour or so'. Certainly, I'm aware that for some - being confronted with some new scenery can make things very hard to distill into a coherent composition. Everything is vying for your attention and it can be hard to give some elements priority over others.

In the main image to this post today, I show you the final image from a shoot in Hokkaido last December. For me, I tend to be drawn to a subject instantly. It's the opposite of the 'filtering down' approach that some of my participants describe. For me, what tends to happen is I see one thing in the distance and I'm so attracted to it, that everything else around it disappears. Let's zoom out from the image above and have a look at the surrounding landscape near it in the image below:

This is exactly what I saw from the side window of my guide's car and I felt compelled enough to ask him to stop so I could go and make a photo of the tree. In fact - if you look closer - you'll see i'm in the shot - making my way across a river bed…

This is exactly what I saw from the side window of my guide's car and I felt compelled enough to ask him to stop so I could go and make a photo of the tree. In fact - if you look closer - you'll see i'm in the shot - making my way across a river bed that was covered in snow, to get to the tree. 

Can you spot the tree I photographed? 

I like to think that if something is worth photographing - is strong enough as a compositional subject -  it will tend to catch my eye. Like window shopping, I often find something jumps out at me. I think this is a combination of visual awareness and visualisation at play. The awareness to spot something and the visualisation to imagine how it could be with other items removed or reduced in the composition.

I often find I start with one object, and introduce others. In the instance of the main image in this blog, I did exactly that - despite all the clutter and confusion of other trees at the roadside, I could 'see' the lone tree sitting on its own, and I knew there was potential. I also understood that I would have very little else in the frame to draw attention away from it once I got closer. I saw all this from the passenger seat of my guide's car and I believe I utilised my visualisation skills in order to 'see' it.

Once I was closer to the tree, I started to think about the surrounding landscape and which elements, if any, I could introduce into the scene. I've introduced the sun into the frame, as this was more a fortuitous event rather than something I'd noticed in advance. I made several shots - some without the sun and some with, because I can never tell at the time whether I'm overcomplicating something, so I like to make insurance shots for later on. I'm convinced I can only do good editing while at home behind my computer, not while on location. But the key point I'm trying to make is that I started with the tree and slowly started to introduce the surrounding landscape into the scene.  

So which way do you tend to visualise your compositions? Are you a 'start with everything and filter it down to a few objects', or do you start with one thing that grabs your interest, and slowly introduce other objects into the frame?

My first Digital Darkroom Workshop

I'm just home from leading my first ever "Fieldwork to Digital-Darkroom" workshop, which entails marrying what is done out in the field with the post-edit stage. My course is based on my e-book - 'The Digital Darkroom - Image Interpretation Techniques'

Still very much a work-in-progress e-book, but I feel I'm getting a better sense of what should be included now that I'm teaching digital-darkroom interpretation skills.

Still very much a work-in-progress e-book, but I feel I'm getting a better sense of what should be included now that I'm teaching digital-darkroom interpretation skills.

The course was run at Adrian Hollister's Open Studio environment in the north-west of Scotland. Adrian runs many workshops with such notables as Joe Cornish, David Ward, Eddie Euphramus and the wonderful Paul Wakefield. His studio has six iMac computers, all colour calibrated and it's on the door-step of some wonderful landscapes which are within a 30 minute drive. Perfect venue for running such a workshop.

I've been wanting to run a course like this for a very long time, because I feel that the editing stage is often considered as an almost secondary, isolated task, something that is unrelated to the capture stage. 

Adrian Hollister's Digital Darkroom Studio, Mellon Charles, Wester Ross, Scotland

Adrian Hollister's Digital Darkroom Studio, Mellon Charles, Wester Ross, Scotland

I firmly believe that the fieldwork and editing stages are interrelated. Our editing sessions teach us about things we didn't notice at the time of capture and they illustrate to us what we need to be more aware of in future - if we choose to make the connection! Similarly, once we know how far we can push and pull images in the digital-darkroom, we are in a more informed position whilst choosing certain subjects, contrasts and qualities of light. There is a symbiotic nature between the two, and so for me, the word 'post' as in 'post-process' discourages our thinking into believing both tasks are unrelated, when they are not.

In fact, I abhor the phrase 'post-process' because it makes the entire editing stage sound like a functional, emotionless act. Images become something you could just stick in a washing machine, turn a few dials and let it run on auto. Which isn't the case. Editing requires much awareness - of tonal relationships, of competing elements, of flow throughout the image.

And adjustments made in the digital-darkroom should be made whilst noticing how our emotional response is affected when we change tones and contrasts in the work. It is much to do about 'feel' as it is to do about technology.

So I made a point that this week's workshop would not be about teaching photoshop, or teaching Lightroom. Anyone can do that in their own time, and that kind of knowledge is easy to get. No, what I wanted to teach was how to interpret what you've captured - to see and take advantage of themes present within the composition, to notice tonal relationships between subjects within the frame, to see that each image has an underlying structure that almost spells out how it should be edited to bring these motifs further forward. 

The digital darkroom is a creative space, one where we can bring out the essence of the motifs we discover in the image. That's its primary function for me. I do not see this as a way for fixing bad images. A bad image is always a bad image. We have an expression here 'you can't polish a turd'. Instead, I see it as a way to bring out the beauty and essence that can, with a bit of interpretation, be found in a good image.

But interpretation is a skill, and like composition, has to be earned and improved over the lifespan of our involvement with photography. There is no manual for this, just an improved ability to read an image, to understand what is going on, and to know your toolkit (software) well enough to be able to bring forward your interpretation.

So I was curious to see how my group of participants would edit their work after five days of guidance and continuous feedback. I definitely saw improvements in most participants work. Certainly in the daily reviews I would notice that all of the participants had observations and awareness of what might be done to help remove distractions, or bring out themes within the work, but what I had not envisaged was that some of the group would be far too subtle with their edits and I think there are a few reasons for this.

Firstly, each one of us has our own aesthetic. We have our own tastes. Some photographers are more interested in the verbatim. What they see out in the landscape is what they want to capture, and so the edits will be done with a lot of sympathy for how they perceived their reality.

Secondly, some will under-edit because of a lack of objectivity. Ideally we need a few weeks between capture and edit. I always find that if trying to edit work straight away is hard because we're so often attached to an idea of what we wanted to convey and if the image is not successful in this regard, we may feel it is not a success. Leave it for a few weeks and you will come back to it with a fresh eye. If there are any motifs of themes within the image - you're more likely to work with those because you're more open to see other things where you were not at the point of capture.

Thirdly, I think under-editing happens through a lack of confidence. Too scared to adjust the image too much because the photographer feels they don't have enough skill to know what to do. But I also think it may be because they feel they may lose something in the process, and could be holding onto how the image looks now, and can't see beyond that to another destination.

It's this that interests me most and I must confess that I feel there is no clear answer. Editing is a skill that is derived from many years of self-improvement. If I look back at my own editing abilities, and consider images I shot 10 years ago, I can see that often I knew there was something missing in an image, but I couldn't put my finger on what it might be. I see tonal errors in them where at the time of edit, my abilities were so untuned I thought I saw beauty. Where I was perhaps overcome by the strong colours of my chosen film, I now see a clumsy edit.

Digital-darkroom skills take a lifetime of continuous self-improvement. We have to put the work in. But we also have to be smart about it. Simply cranking up contrasts or saturation across the board is a clumsy way to edit work, and it should be something that doesn't happen so much as it did when you began your editing career. But things only change if you take the time to consider and reflect on what might be the best way forward to edit your work, and self-awareness is something that has to be built upon over time.

I found my Digital-Darkroom workshop did help my participants. There were moments where I felt I had led my horses to water, only they were unable to drink, because if they can't see it themselves, then I can't force them to. Improving editing skills can't be rushed, but certainly a week in the field and behind a computer with a photographer you like the work of, may help bring about an improved sense of awareness, and that's what I believe happened this week.


The Journey

Tonight I'm busy editing a lot of new images from Iceland and also Lofoten and I can't help be reflective about what I've captured this year so far.

There was so much snow in Lofoten that I didn't know where to take my group, until one of them said 'are there any beautiful tree's we can photograph?'

There was so much snow in Lofoten that I didn't know where to take my group, until one of them said 'are there any beautiful tree's we can photograph?'

As much as I might want to plan a shoot, decide on what I want to capture, things never turn out the way I expect them to, and that is alright with me. In fact, that is very good indeed.

In last month's newsletter, I discussed the need to not pre-visualise before turning up to a location. We all do it - we've seen countless photos of places, so much so, that it's practically hard to see them any other way. And yet the art of a good photographer is to work with what he's given, and not lament what we didn't get. This means turning off any pre-visualised ideas of what you want your trip to be, because photography is a journey. 

I never know where I will be taken. I never know what I might see, and even though I go back to many locations each year in similar seasons, I still find new things.

There was so much snow in Lofoten that I didn't know where to take my group, until one of them said 'are there any beautiful tree's we can photograph?' I knew of a place, but it has never been too successful for me in the past, because the background behind the trees is always too visible. This time it worked because there was no background. It also worked because there was so much snow in the sky and it was so similar in tone to the earth. 

Perhaps I'll see this scene again next year when I'm back in Lofoten, but I'm not counting on it. In fact, it's better to just go along for the ride and see what happens and where the light and the atmospheric conditions take me.