Printing - the act of making your work into a physical tangible object

Today is very windy outside, so despite being very keen to get my daily bike ride in, I can't. So what better way to spend the time than to do some printing.

I love small prints. This one is matted to 40x50cm and is a recent picture from Patagonia this May. It's actually a colour photograph, although you might not tell from the jpeg above.

Printing is enormously satisfying and dare I say it - the ultimate end-game with our photographic endeavours. I know, you love just being out there with your camera and it's all about the journey. I completely agree. But there's also something very satisfying about completing some work in print form. Your images cease existing as some electronic group of pixels on a website and instead are transformed into being tangible real-world physical objects. In this age, that alone for some of us is a rare thing indeed.

the recounting of an experience

For a long while earlier this year I felt as though winter would never end.

Now it feels like a distant memory.

I've just been browsing through my images from the island of Senja. It's the first time I've done this since I finished work on the edits back in March this year. You see, I don't often look at my own work once it's done.

But today I received a print order for one of my Senja images, and one thing has led to another and I've just spent the past twenty minutes browsing through the images I created back in February of this year.

When I look back at the images from a shoot, I often find my mind is filled with the same sensory feelings I had at the time I was there. It's like I've just been transported back to the shoot and I'm reliving everything I felt whilst there, and who I was at that moment in time.

I can recall the quality of the light throughout the day while I was on the island of Senja, and how it never really ever got very bright for most of the week. While I was there I was living in a perpetual semi-winter-darkness of muted tones and almost no colour. My energy levels were sluggish as I was still feeling the effects of the short days and lack of sunlight that winter often provides.

I think that's one thing that is very powerful about our own imagery. Because the images are ours, we have the ability through them, to be transported back to a place and time as if it was just a recent event in our lives. This is a highly personal experience as our images don't have the same effect on others. The impressions they give us are ours and ours alone.

I find any personal feelings tend to diminish the more frequently I visit my images. If I look at them too much, the impression of the shoot and my time whilst there gets lost in the new imprinting of current experience,  of where I am now, and of who I am at the moment of the current viewing. And the more I do this, the more the images become so familiar that they trigger almost no memory of past events at all. I  become numb to them.

Like a piece of music from our past that is played on the radio, the music has power to take us back to another time. I think with images we've made, the same is true. I just don't wish to view them too often, otherwise I worry that any emotions and memories associated with them will soon become blurred at best, or at worst, lost to me forever.

Do you desaturate outside of your comfort zone?

We also have our comfort zones when it comes to colour and contrasts. As a beginner I was always reaching for the high-contrast option, the deep blacks and bolder colours that I could get from my Velvia films and from the available light in the landscape.

But our world does not just have one face. It has many faces and many colours, tones, contrasts, and all of it is worthy of being utilised in our photography. I think moving into new regions, using softer tones and more subtle colour palettes takes time though. Again, like a child building a vocabulary of words, we too have to build up a vocabulary of light qualities and colour responses that we know will work in our imagery.

Desaturated (compare to the originals below).

Desaturated (compare to the originals below).

Our comfort zones often mean we have a tendency to push for the dramatic and bold. Not just in our photography, but in most things in life:

Q1. Does the bass and treble on the hi-fi system have to always be boosted?

Q2. Does the food always need to have salt and sugar added to it?

Q3. Do we always have to search out dramatic sunsets?

Q4. Do the Photoshop / Lightroom sliders always have to go up rather than down?

Can't there be enjoyment in the subtle as well as the dramatic? Do you even allow it in your work? Or are you always striving to make things shout out more to the viewer?

Going the other way leads you into new territory where there is another beauty, another enjoyment.

A1. Turning the Bass down on your hi-fi allows the mid-range to have more clarity.

A2. Cutting back on the sugar and salt in your food allows the natural flavours to surface.

A3. Shooting in more muted light brings you to new colour palettes, softer tones and new moods in your work.

A4. Moving the Photoshop / Lightroom Sliders to reduce things rather than boost them bring you to new colour palettes, softer tones and new moods in your work.

We often hang on to stronger tones and colour more through habit than an appreciation for them.

The originals before I desaturated them. We often hang on to stronger tones and colour. It's a habit, more than an appreciation for stronger colours and harder contrasts.

The originals before I desaturated them. We often hang on to stronger tones and colour. It's a habit, more than an appreciation for stronger colours and harder contrasts.

Where do your comfort zones currently sit? Are you often trying to push the dramatic aspect of your work or do you also play with the more subtle, softer aspects of our world? I ask this in all seriousness because photographs aren't just about great placement of objects to make good compositions. Good compositions aren't just about objects, but often about the interplay between colour, contrast and luminance.

We have so many comfort zones in what we do, and knowing where you are with that, indeed who you are, is key to growing as a photographer.

Using tones outside of your comfort zone

When we edit our work, I think it's very easy to sit within a confined range of known and often used tones. We have what I would describe as a tone comfort-zone, one which we have settled into and tend to apply to most of our work.

Part of this is due to visual awareness issues, of not really thinking about luminance in the first place. We think of our images more in terms of scenery - mountains, rivers, grass, rocks, whatever. But we haven't passed this early stage and moved on to thinking about these subjects less as what they are, but what they provide in terms of luminance and other tonal qualities.

Indeed, our edits can be rather narrow in their tonal range, just like our vocabulary is narrow when we first learn to speak. We have to move outside of our comfort zone at some point, but this can be difficult if we're not really aware of what's out there and how luminance levels in the far brighter and darker regions of our images may serve us.

One technique I use is to push the luminance to extremes and then reign it back until I think it looks good. It's well known that if you move something to where you think it should be and compare that to where you would have ended up if you pushed it well beyond where you think it should be and move it back, your initial judgement will have been conservative. In other words, by really going over the score and then moving it back to where you think it should be, you'll find you've pushed the boundaries in your edits.

We all have our visual comfort zones and it's good to try to move beyond them. The only way to do that is to exercise your visual awareness by placing yourself at the extremes well outside the normal parameters that you reside, and see how the new terrain fits.

Our visual sense needs to be exercised for us to learn to truly see what is possible, and this is one such way to do it.

Forthcoming e-Book

On the 25th of this month, I shall be releasing a new e-Book. This one is about tonal relationships and their importance during the editing of our work.

For the past two years I've been offering a Digital Darkroom workshop which specifically deals with how to interpret ones own work. It's not a 'learn Photoshop' or 'learn Lightroom' course as those kinds of skills can be picked up from many sources. What can't be easily taught, is how to look at your work and see relationships within the unedited work, and how to utilise these to realise the full potential of your vision.

During these past two years, I've been thinking about how to possibly simplify my message about editing. It all really comes down to seeing tonal relationships in your images and working with these to bring your images forward.

At the moment, there seems to be a real imbalance between those that value fieldwork tuition and those that value post-processing tuition. Although many of photographers have adopted post-process tools such as Lightroom or Photoshop, I feel the general consensus at the moment is that the skill lies in the capture stage, and the post stage is something anyone can do. I don't entirely agree with this.

For me, the edit stage is an enormously creative place to be. Although I give 100% of my effort to capture something in-camera that I love, I also give 100% of my effort to the careful birth of my images. In my digital-darkroom I will spend days thinking about tonal imbalances, colour-balance adjustments and further aesthetic changes I wish to convey in my work. This is an absorbing time for me where I find myself reliving the work, immersed in the memories of being there making the shots. I also get great satisfaction from feeling how the images morph and change as I adjust and impart my own vision onto them.

However, you may think that the edit stage is a place to cheat, or to try to make things better than they really were. I've never seen photography as  'this is how it was' but more 'this is what I felt', or 'this is how I feel now' about the images. I do believe that any image we choose to work on in the edit stage should already display great potential and I only choose to work on those where I am inspired to do so.

I believe the image is never complete once we click the shutter; we're only truly half way there.

Light Table

Over the past five or six years, I've noticed a resurgence in analog photography. There is usually one or two participants on my workshops who now have a traditional black and white darkroom at home, or are a colour film shooter. Some are pin-hole shooters but most of them are hybrid photographers. They have digital and film and like to experiment with all the mediums now.

An A2 in size LED 'light pad' used as a photography light table.

An A2 in size LED 'light pad' used as a photography light table.

This I feel, is greatly refreshing to note. For a long while, I was always being asked 'have you gone digital yet?' and this question seems to have abated over the past while because we've gotten over that uncomfortable period when everyone feels they need to throw out the old for the new. It is no longer an either / or situation and we are now living in a period where photographers are embracing multiple formats, multiple systems and along with that, different mediums such as palladium printing, traditional black and white as well as C41 and E6 processing.

For a while, it was becoming harder to find things like a good light table. I have a beautiful one at home by Gepe. It has the same colour temperature as my monitor and daylight viewing booth, but I wanted a larger area - something around A2 to help me do an 'overall' review of images I've shot. I like to be able to see the bigger picture, to understand what kinds of images I've made on a shoot and how I think they may be edited together into some cohesive final portfolio.

I bought this A2 light pad, as it's called. It was pretty inexpensive for what it is (£70). It's great for helping me spread out several sheets of transparency roll films for review! I just love looking at transparencies on a light table - the scene comes alive for me but most importantly, it allows me to reconnect. I find my imagination is awakened and I can step back into the scenes I was photographing.

The downside about using an LED light table though, is that its colour temperature is far too 'cool'. Images can appear more blue or cold than they really are. The other issue, which is the most important one for me is that when I return back to my monitor the colour temperature shift is noticeable. My monitor appears to look rather yellow in comparison. It's not really. It's just that the LED is far too cold. 

So I bought a Cinegel #3409: Roscosun 1/4 CTO A2 sized colour correction gel filter to help reduce the coldness of the LED light table. It's exactly what I needed to bring my 'lighted' into line with the colour temperature of my monitor and daylight viewing booths.


Lyme Disease in the UK

Today I found an article about Lyme disease on the BBC news website. It's a timely one as Lyme disease is on the increase throughout the British Isles and is still not widely known about.

If you are an outdoor photographer living in the UK, you should be made aware of Lyme disease. It is a disease that is transferred by deer ticks and if it goes untreated, can be a debilitating and dangerous illness.

  • Ticks are active March to October, but they can be active on mild winter days
  • You will not feel the tick attach to you, so check your skin

In this BBC news article, the writer goes to great pains to explain that Lyme disease is on the increase and can be picked up in many places throughout the UK. The disease is transferred via deer ticks - if you get bitten by one and start to feel really poorly, then it is vital that you seek medical attention.

Here is an exerpt from Stopthetick.co.uk:

Initial symptoms differ from person to person, this makes Lyme disease very difficult to diagnose. Some people with Lyme disease may have no symptoms at all.

  1. There are three phases to Lyme disease: In the first phase, a red ring-shaped rash (called Erythema migrans) appears (in 35-50% of cases) within three weeks at the site of the bite. This rash slowly expands, then fades in the middle and finally disappears.
  2. During the second phase, flu-like symptoms appear: headache, exhaustion, pain in the arms and legs. These symptoms are self-limiting and will disappear on their own.
  3. During the last phase, often months after the bite, more serious and chronic symptoms will occur: joint pain, cardiac arrhythmia and nervous system disorders.

This disease isn't taken seriously enough by the medical profession, mostly I feel, due to a lack of understanding and a belief that it is not possible to get it in areas where you actually can. I've had direct experience of this myself because I was dismissed by a GP when I went to see him about a suspect bite that had now covered my entire leg. He couldn't believe that it may be possible to pick up Lyme disease in the countryside outside of Edinburgh. In the BBC news article, the writer describes a similar circumstance where his GP was doubtful that he could have picked up Lyme disease near London.

I think it is good practice to always check yourself over each time you have been outside during the tick season. Take note whether you get bitten and if you start to feel like you're coming down with the flu. The important thing to know about Lyme disease is to know what it is and what the typical symptoms are.

Further Reading:

www.stopthetick.co.uk/

http://www.lymediseaseaction.org.uk/about-ticks/

BBC new article - I was floored by a Tick

New Atacama images

I have a backlog of so many images from my travels over the past few years and I've become aware that there really has to be the right time to work on them.

Rather than fret and put pressure on myself to work through that backlog,  I should just work on what I feel inspired by and leave those other images for another time. But the backlog 'does' need to be cleared, otherwise a 'creative blockage' - builds up in one's mind, which isn't a good thing.

One of the difficulties for me, is that I need space and time away from what I do, so I can approach the work with a sense of enthusiasm and objectivity. If you travel a lot like I do, and there isn't a lot of space in your schedule, then it can be hard to find your mojo.

Balance is key to everything we do in life. Too much of one thing and it starts to suffer. These days my photography is no longer my hobby. I have had to choose other activities so I have time away from what I do. So this summer I've spent a bit of time cycle touring and long-distance racing around the north of Scotland.

I mention all of this, because I simply cannot come home and delve right into editing work straight away. Apart from requiring some distance to maintain a sense of objectivity from the shoot, by the time I've spent over a month somewhere, I'm a bit saturated. The enthusiasm is starting to wane simply because I need some balance in my life.

Regarding the editing of this new Atacama work, I had a few false starts trying to begin work on them. When I've not given myself enough time to recharge - I can view things rather negatively. If i'm not in the right frame of mind, it's easy for me assume the images I've shot are no good.

It's hard to gain inspiration in something if you're needing some time away from it.

So this is one of the reasons why I have a backlog of images from the past few years. I just haven't found the right time and place to edit them. To ease the burden of feeling there is so much of a backlog, I've given myself complete permission to have that backlog. I've also made it clear to myself that it's ok not to work on stuff when I don't want to.

This self-acknowledgement has helped tremendously in dealing with the work. I've found as a result, that the work doesn't get left behind. The fear of neglect has gone, and a new way of working has surfaced. It is not unusual for me to delay working on images for up to a year or more now. I like to think the gestation period gives me time to consider and approach the work the right way.

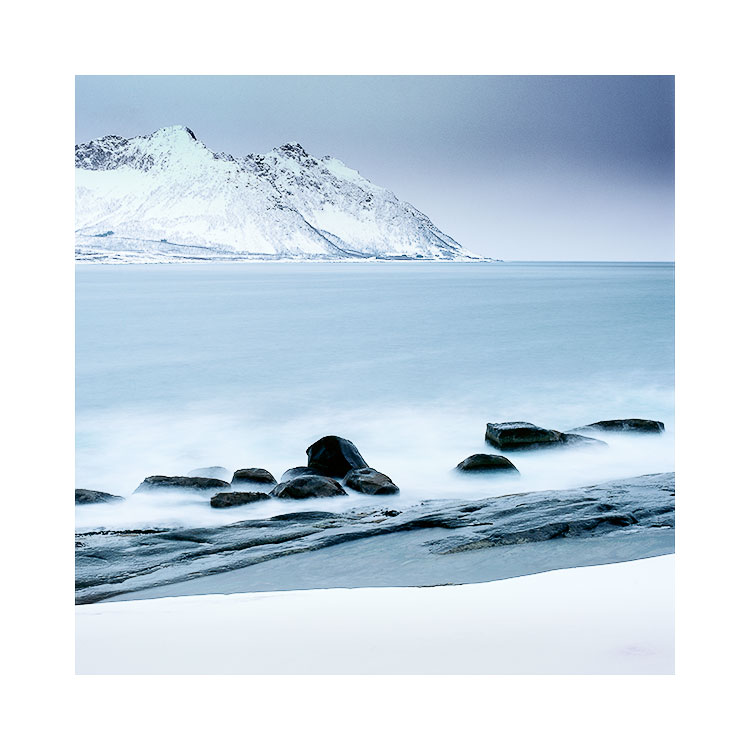
This collection of Altiplano images had a few false starts. I was letting self pressure get in the way. So I backed off from it all and chose to do other things.

Then one morning, with no intention to begin work on them, I found that things just started to click. There was positive flow. As a result I never made it out of the house for the next 24 hours. I immersed myself in the flow of creativity I found myself in and above all enjoyed the process.

Patagonia 2016

This week I published some new images from Patagonia on this very website. 

My previous visits to Patagonia yielded monochromatic, often dark toned, images. I felt at the time, this really summed up my view of this landscape. Seems I may have been too quick to judge as this year I found myself confronted with a softer, lighter view of the place.

Serrano Forest,Torres del Paine National Park, Chilean PatagoniaImage © Bruce Percy 2016

Serrano Forest,
Torres del Paine National Park, Chilean Patagonia
Image © Bruce Percy 2016

I think the appreciation of what I saw and how I interpreted Torres del Paine this year was influenced heavily by my visit to Hokkaido last December.

Since that visit, I feel my images have been moving towards the higher registers of tonality. Rather than focussing on the dark tones and 'drama', I now feel I've found a few more octaves of light to play with.

Like a singer who stays in the middle range of their voice for safety, I'm curious if this is what most of us photographers do with the tonal subjects we shoot. Most of what we do resides in the safer tones. Yet, by pushing the exposures to the extreme outer edges of our comfort tones, we may find some new things to say in our work.

Ice & salt in Laguna Armaga,Torres del Paine National Park, Chilean PatagoniaImage © Bruce Percy 2016

Ice & salt in Laguna Armaga,
Torres del Paine National Park, Chilean Patagonia
Image © Bruce Percy 2016

In this new work, there is a mixture of dark images and as well as lighter ones. The skill I feel, is to marry them so they feel part of the same set. 

Tones and tonality has become something I'm very obsessed with over the past few years. I think it's easy enough to make nice images these days, but to really make your images stand out, or to go that extra mile, I feel an understanding or tones and relationships between them is vital.

Returning to the same places time and again is a tortuous thing for me to go through. Not only am I so fortunate to return to Patagonia on a yearly basis, but each year it feels as if the place sets me new challenges, new homework.  The benefits are enormous. Through this process, I get to grown as a photographer in some way.

Rio Serrano Forest, Torres del Paine National Park, Chilean PatagoniaImage © Bruce Percy 2016

Rio Serrano Forest, Torres del Paine National Park, Chilean Patagonia
Image © Bruce Percy 2016

What I like most about this years work, is that I made photographs of lesser, iconic views. I've never shot Lago Pehoe before without the Cuernos mountain range in the background. The mountain range always seems to dominate my view of the place. It's therefore unusual for me to make more abstract or intimate compositions.

Lago Pehoe, Torres del Paine National Park, Chilean PatagoniaImage © Bruce Percy 2016

Lago Pehoe, Torres del Paine National Park, Chilean Patagonia
Image © Bruce Percy 2016

At Lago Sarmiento we had no view of the Paine massif, and this was very freeing. I felt I could concentrate more on the shore and the rock formations there. Sometimes the Paine massive is just too magnetic. It can over dominate the scene.

Rio Serrano Forest, Torres del Paine National Park, Chilean PatagoniaImage © Bruce Percy 2016

Rio Serrano Forest, Torres del Paine National Park, Chilean Patagonia
Image © Bruce Percy 2016

Colour Proofing.......

Today I'm colour proofing...... But I have to calibrate my monitor first, to ensure that what I see on it, is a close representation of what's actually in the files.....

Most people choose 'native white point', but that may result in the monitor being too cool in tone. The only way to confirm your monitor is calibrated, is to compare it against an icc profile verification print - essentially a  file that has been accurately measured and is guaranteed to be close to the file it was created from. I put this file under a daylight viewing booth (as shown below) and compare it with the source file it was printed from, with proofing switched on in Photoshop. If the 'perception' is that they are similar, then I've got the monitor calibrated & profiled well.

For essential colour accuracy, one must use a daylight viewing booth to confirm the profiling of your monitor. If the print target does not match the monitor - then the calibration / profiling is off. You also need to have a torch and an Icelandic P…

For essential colour accuracy, one must use a daylight viewing booth to confirm the profiling of your monitor. If the print target does not match the monitor - then the calibration / profiling is off. You also need to have a torch and an Icelandic Puffin in your studio too :-)

On a side note - daylight viewing booths such as the one I use from GTI have a colour temperature of 5000k. But there's more to it than just assuming that if the viewing booth is 5000K, then my monitor should be set to the same colour temperature. This won't work. GIT have an article that explains what 5000K actually means if you really need to know this stuff, but for most purposes, you'll find a 5000K viewing booth will be comparable to a monitor running at a temperature much higher than 5000k. (If you put your monitor down to 5000K - it will go seriously yellow and it definitely won't match your viewing booth at all).

For me, the most critical aspect is the neutrality of the black and white tones. In the  icc profile verification print you see above, there is a monochrome section in the top left of the file. If I have the monitor white point set too high, the monochrome picture may appear too cold (it should theoretically go blue but some monitors don't - see below for more on this). Conversely,  If you have the white point set too low, then the monochrome area will look too warm on the monitor. By fine tuning the white point of my monitor (through the calibration software I use) I can get my monitor closer to what I see on the print. This is an iterative step that I do until I find the right white point.

Lastly, as mentioned above, it's easy to assume that computer monitors should become bluer (cooler) as their white point is increased. This isn't always the case. Some monitors may go either green or magenta when their colour temperature is turned up too high, I find that my Eizo goes a little green.  Apparently setting the white point only alters the blue to yellow colour axis and not the green to magenta tint.

So If you do find your monitor is going a little green or magenta, then you may have to compromise and stick to the native white point. I would suggest however that you experiment.  For me, I found moving my monitor down to just below 6000K seemed to work nicely but your findings may differ.